How do I opt into or out of full text search on Mastodon?

Since version 4.2.0, Mastodon allows full text search where the entire contents of posts is included when people do searches.

For privacy and safety reasons, the full text search feature is entirely on an opt-in basis. By default your posts are NOT available to search by that method, and you have to actively opt into full text search to make your public posts searchable without hashtags.

To opt into full text search:

  1. Log in through your server’s website
  2. Click on your profile icon
  3. Click on Edit Profile
  4. Click on the tab labelled Privacy & Reach
  5. Tick the box marked Include public posts in search results
  6. Click the Save Changes button at the bottom of the screen

If you change your mind, do the same steps again but untick the box and then save changes.

↩ Back to the front page

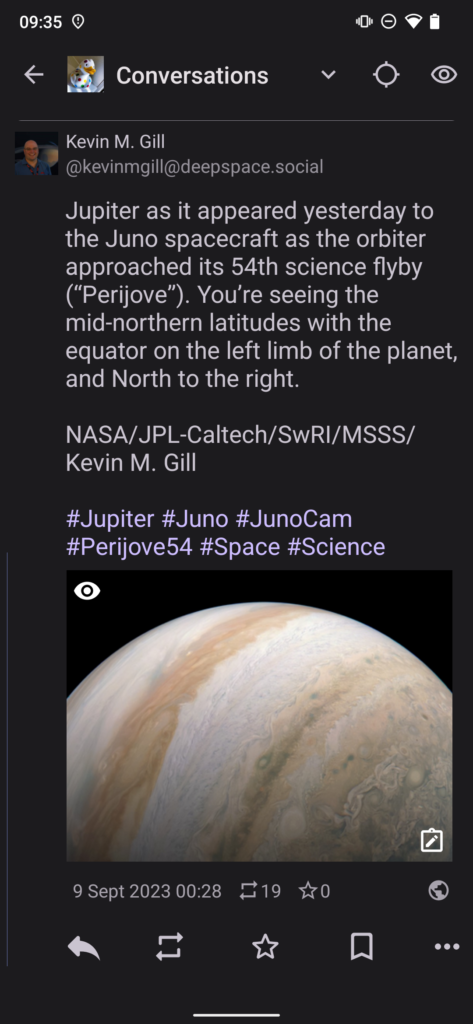
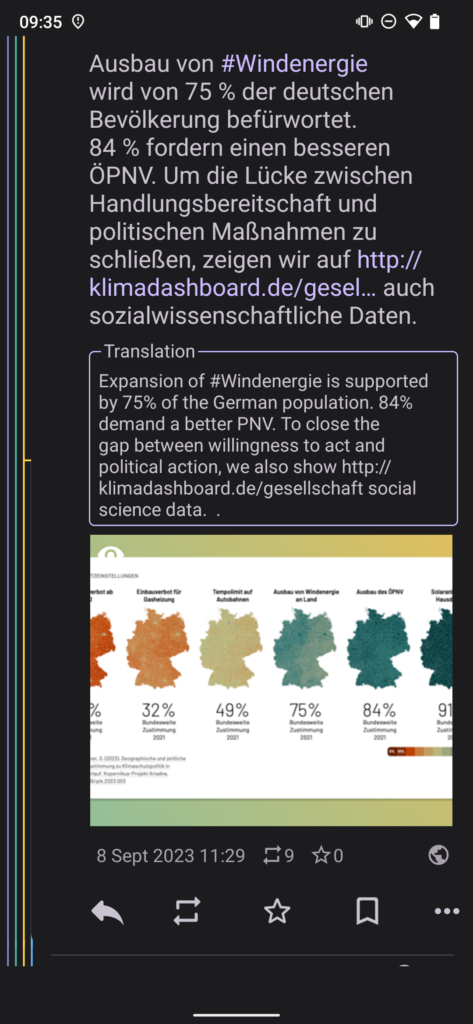
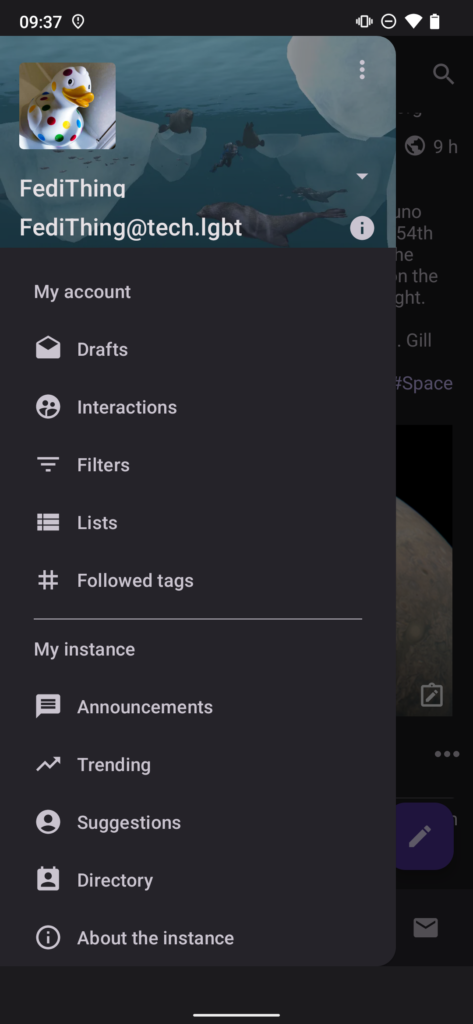
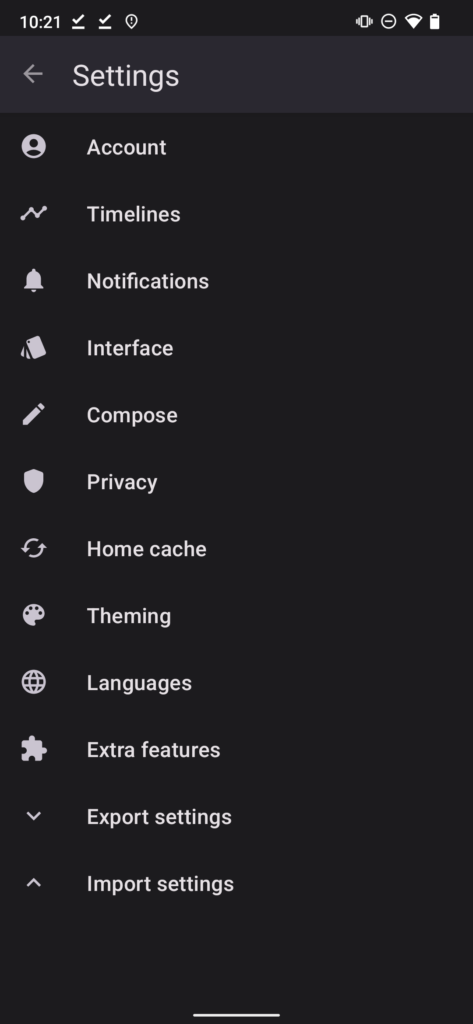
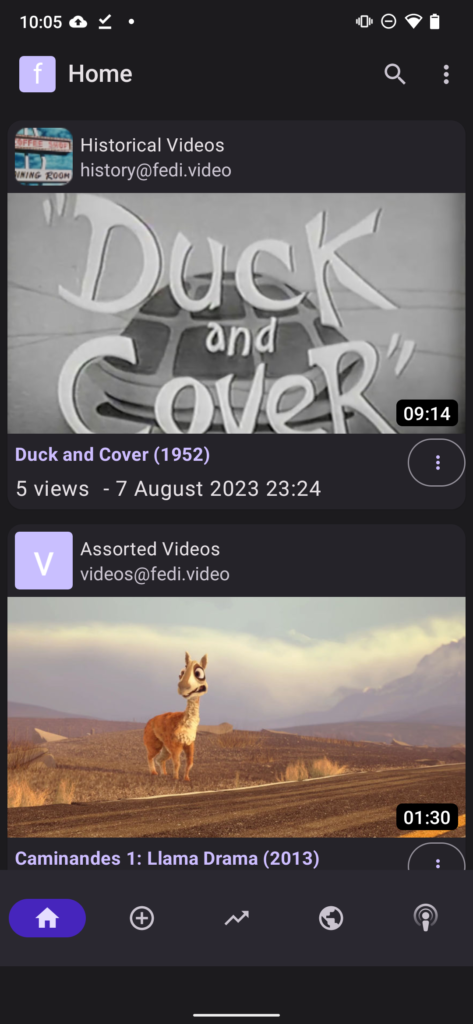
Fedilab for Android

Third party Mastodon, PeerTube & Fediverse app, free open source software, available from Google Play (paid) ⧉ & F-Droid (free) ⧉

General impressions

At first glance appears to be pretty standard, but once you start going through the options and settings there is so much more under the surface. Many, many useful features and good support for non-Mastodon Fediverse servers. It’s not the best-looking app, but that doesn’t matter because it does lots of things other apps cannot do.

Nice stuff

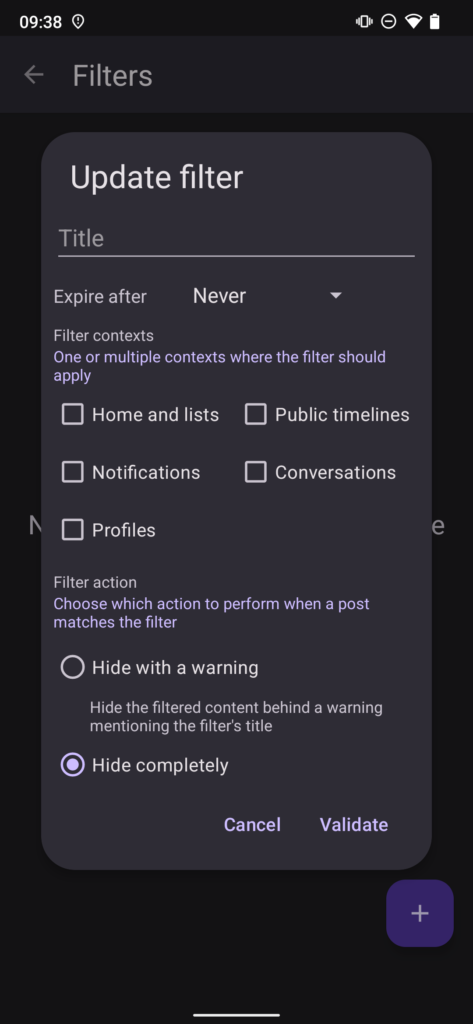
  • All the standard extras available the web interface such as post editing, pinned posts, hashtag follows, lists, filters, trending tags, trending posts etc.
  • All the timelines (Home, Local, Federated, Explore) are there, as are all the visibilities (Public, Unlisted, Followers-Only, Mentions-Only and Local-Only (for servers that support local-only posts))
  • Free open source software
  • Allows users to be muted just on home timeline while still appearing on lists, which is great for creating multiple separate timelines from the same account. (Also, you can set lists to automatically include home muted users.)
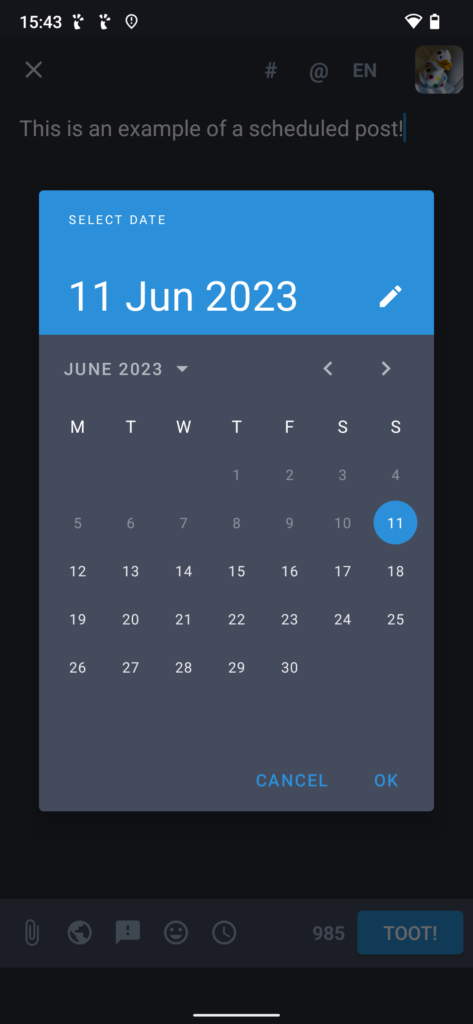
  • Scheduled posts and scheduled boosts, including boosts of own or others’ posts
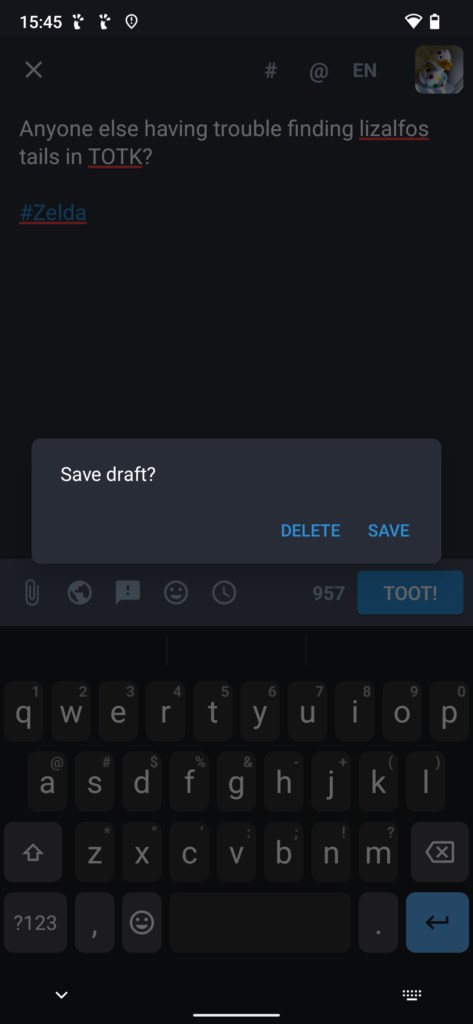
  • Post drafts, automatically asks you if you close a message without posting it
  • Built-in translation, built-in dictionary and spell checker
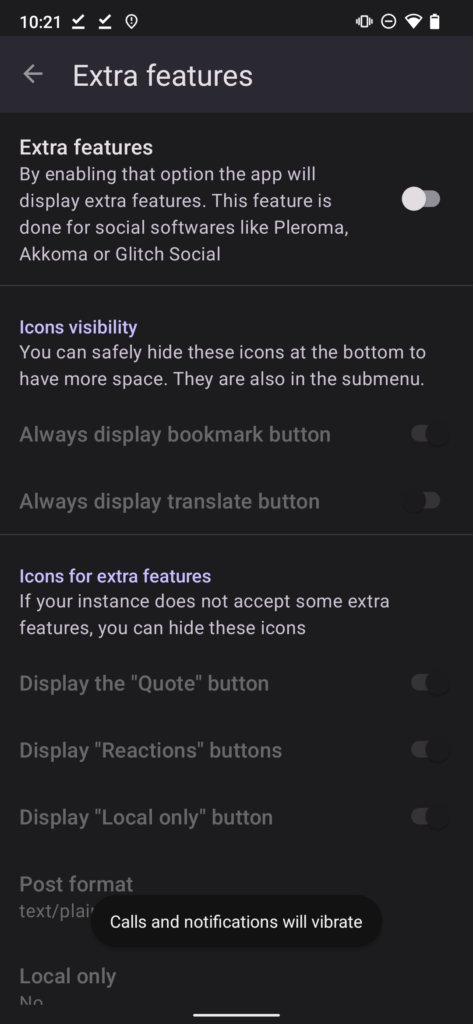
  • Good support for non-Mastodon Fediverse server types including Pixelfed, PeerTube, Friendica etc. Also includes support for extra features on Mastodon forks such as Glitch and Hometown.
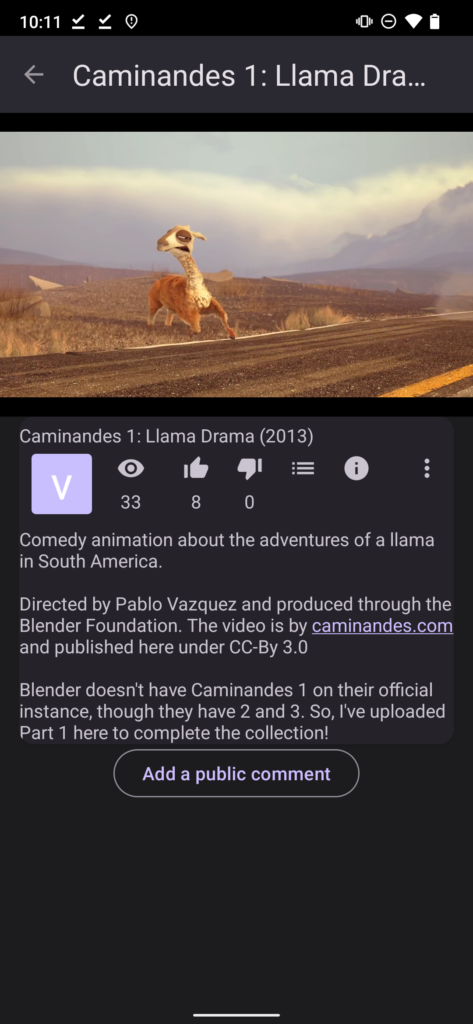
  • PeerTube interface is particularly good, allows all the options from the web interface including uploads, and Fedilab can easily be used as a dedicated PeerTube app
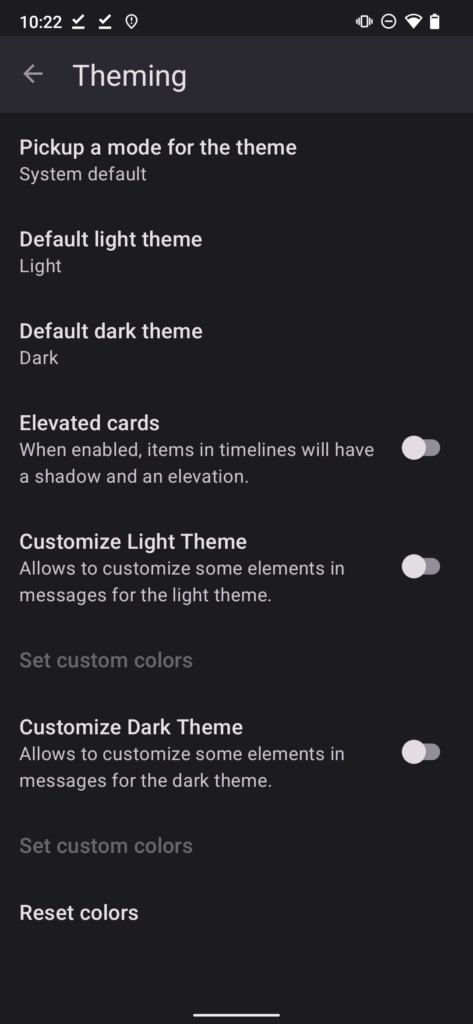
  • Customisable timeline and interface options, colour themes, adjustable text and icon sizes.
  • Conversation thread maps
  • Lets you fetch data from remote servers which allows conversations and profiles to be updated with information that hasn’t federated to your server yet.
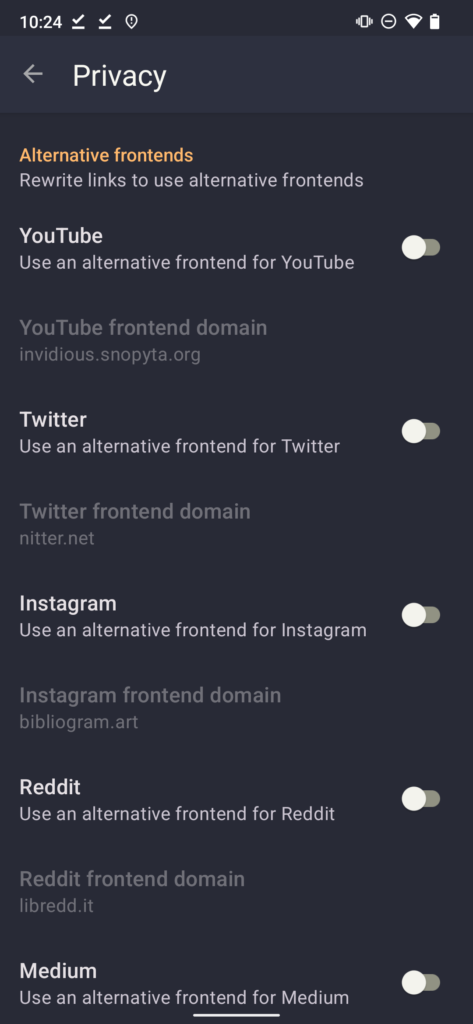
  • Optional privacy features for links such as UTM stripping, and using alternative frontends for links to popular services (for example Nitter to view Twitter links, Invidious to view YouTube links etc).
  • Lots more options such as automatic cache clearance.

Not sure one way or other

  • Fedilab is a paid app on Google Play but free-of-charge on F-Droid. This is as the developer wishes to encourage people onto alternatives to Google Play.

Potential drawbacks

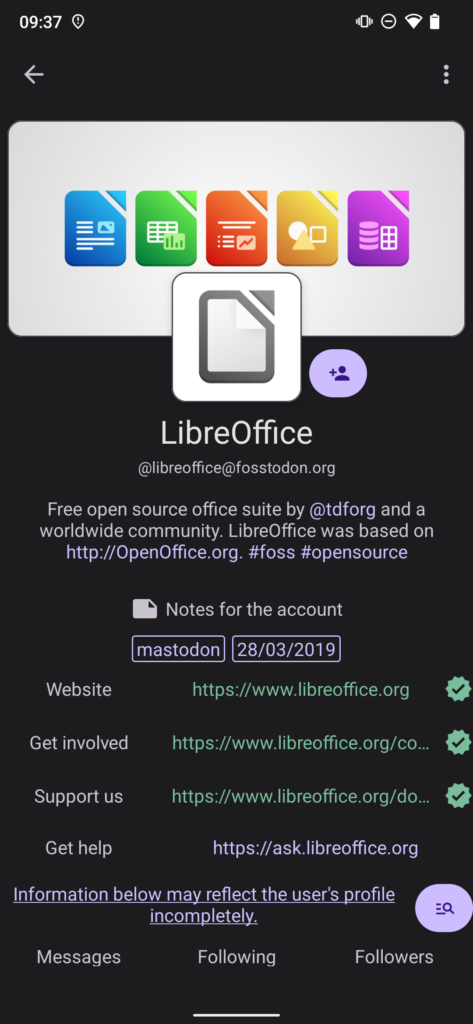
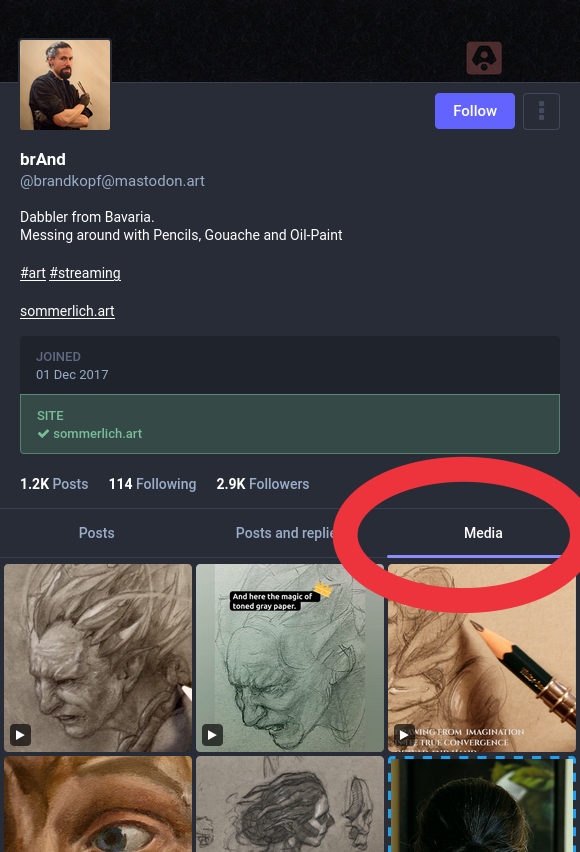
  • Some of the formatting could be slicker and neater, for example metadata tables on profiles look a bit messy
  • Some English translations slightly odd, such as “trending messages” when it means trending posts
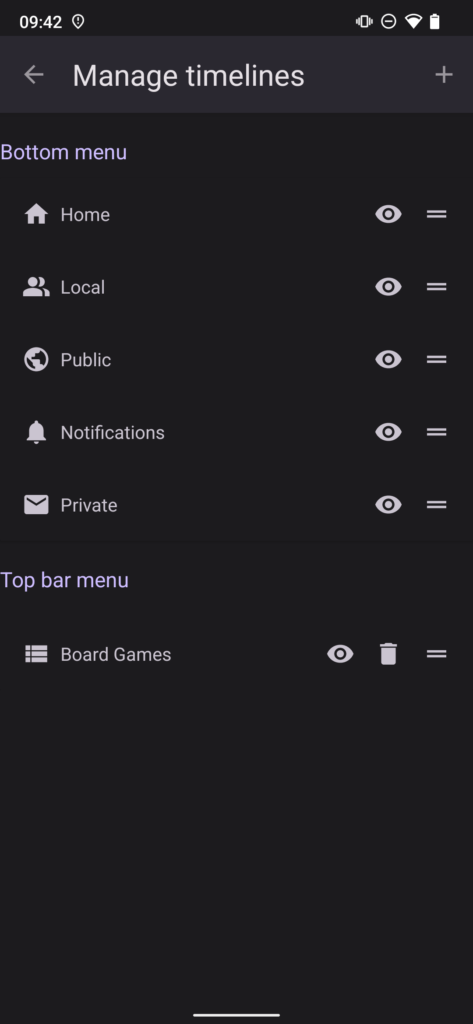
  • Occasional weird bugs, for example the Manage Timelines page brings up a “No timelines was found on this instance” error message

Hints & Tips

  • Polls can be added to posts by clicking the attachment button (the paperclip) and selecting the poll icon
  • You can jump to the top of a timeline by double-tapping the timeline’s icon

↩ Back to the front page

How do I stop seeing the same boosted post again and again in Mastodon?

If a post is boosted by a lot of people, you may see it repeatedly in your timeline. This can be annoying if you’re tired of seeing it.

There is already a feature in Mastodon to prevent this happening, called Group Boosts, and it is on by default, you don’t need to do anything to switch it on. Unfortunately, it is hardcoded to allow boosts to repeat after 40 other posts have been in your timeline. This limit worked okay in the early days of the Fediverse when things were quieter, but nowadays with millions of people online you are a lot more likely to see repeated boosts.

This 40 posts limit cannot currently be adjusted by users or admins, but hopefully the developers could allow this to happen. If you are comfortable using github, you can vote for this limit to be adjustable by giving a thumbs up to the first post in this thread ⧉.

↩ Back to the front page

Scheduling posts on Mastodon

There is a built-in post scheduler feature on Mastodon, which lets you write a post in advance and set it to be automatically posted at a particular time. For some unexplained reason it is not accessible from the official Mastodon interface, possibly because the developers have not written an interface for it yet.

However, it is still there and works fine, and you can access it through third party apps such as Tusky and Fedilab ⧉. You can also use third party websites such as FediPlan ⧉ and Buffer ⧉ to schedule posts on Mastodon.

If you’re comfortable using Github, you can vote for an official Mastodon scheduling interface to be added by giving a thumbs up at this issue ⧉.

↩ Back to the front page

How to block (defederate) a server on Mastodon

Each server on the Fediverse is independent, and can choose to cut off connections to any other server if it wants to do so. This process of blocking other servers on the Fediverse is known as “defederation” or “fediblocking”.

Usually this is done for the sake of user safety, for example if another server is failing to moderate abusive behaviour, but it can be for any reason that the server admin considers important.

If you’re an admin on a Mastodon server, here is how to defederate other servers on the Fediverse:

  1. Log into your admin account on your server’s website
  2. Go to Preferences > Moderation > Federation
  3. Click Add New Domain Block
  4. Enter the domain name of the server you want to block (for example “threads.net”)
  5. From the Severity dropdown menu select Suspend
  6. Optionally add comments if you want to remind yourself why you blocked them, or if you have a public list that explains your server’s blocks
  7. Click Create Block

Once you’ve done this, your server will refuse connections from the blocked server and any follows from those servers will be removed.

These blocks work for any Fediverse server type, so you can block non-Mastodon servers as well.

Do I have to do this for every single server I want to block?

By default, blocks are done one at a time. However, you can also import ready-made blocklists which let you block lots of servers at once.

Is there a less drastic alternative to blocking?

Yes, you can choose Limit from the Severity menu instead of Suspend. Limiting (also known as Silencing) does not cut off connections, and allows follows to carry on, but it hides all posts from that server unless people are following the account that makes them.

What if I change my mind? How do I unblock servers?

To remove a domain block:

  1. Log into your admin account on your server’s website
  2. Go to Preferences > Moderation > Federation
  3. Click on the domain you want to unblock
  4. Click Undo Domain Block

If I unblock a server, will people’s follows be restored?

When an admin defederates a server, that cuts off all the follows between that server and the admin’s server.

Unblocking a server allows people to follow each other again, but it does not automatically restore follows that existed before the defederation happened. This is an important reason to consider carefully before defederating a server.

If you want to distance yourself from a server but don’t want to cut off follows, use the Limit/Silence option instead of Suspend.

↩ Back to the front page

Tusky for Android

Third party Mastodon app, free open source software, available from Google Play (free) ⧉ and F-Droid (free) ⧉

General impressions

Solid, reliable and mature with continual development and updates. Works the way you would expect it to, and matches up nicely with the website interface. This is what the official Android app should have been.

Nice stuff

  • One of the longest-supported Mastodon apps, been around longer than the official app
  • Feels very intuitive, arranged logically
  • Free open source software
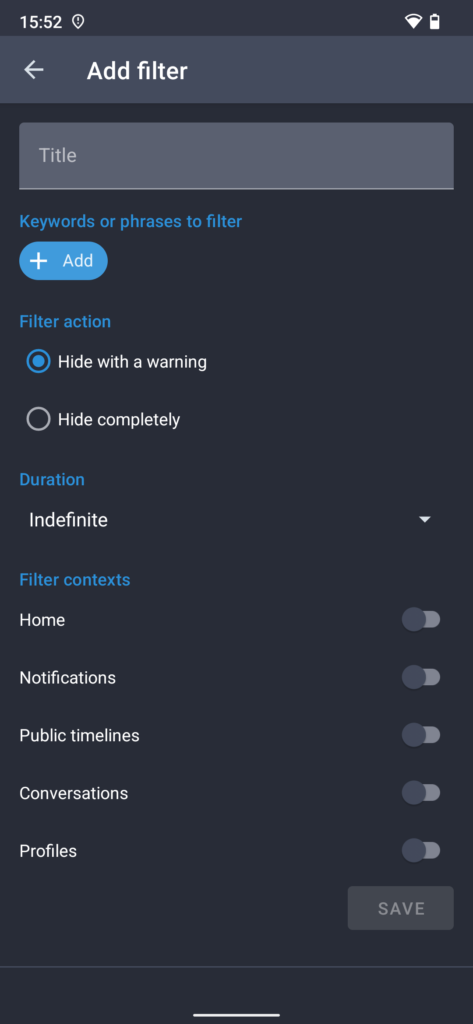
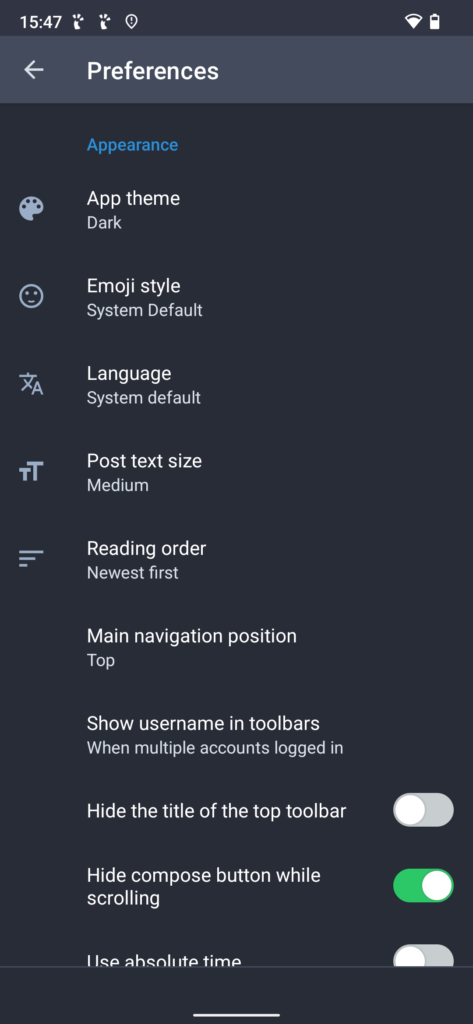
  • Lots of features that are missing from the official app and/or website, such as scheduled posts, drafts, reversal of reading order, image cropping etc.
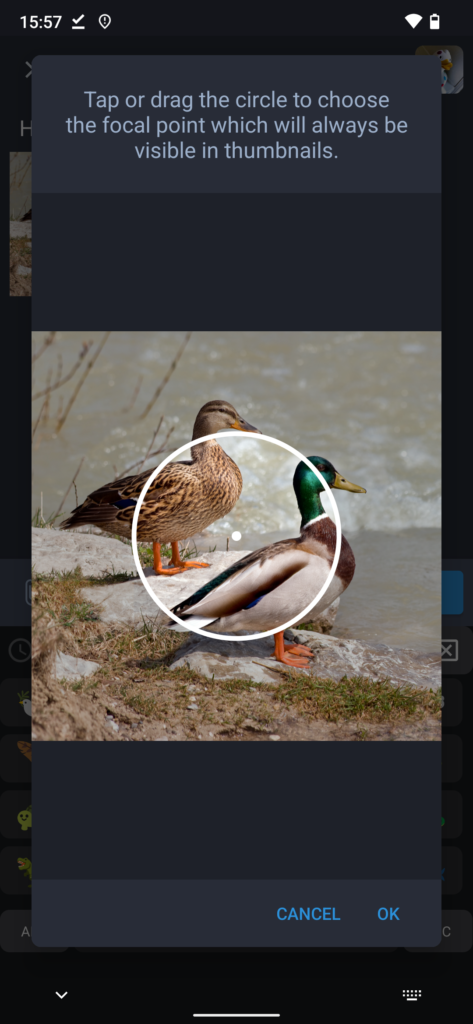
  • Other features include post editing, image focus editing, bookmarks, lists, polls, hashtag following, filters, private profile notes, all post visibilities including Unlisted, all timelines
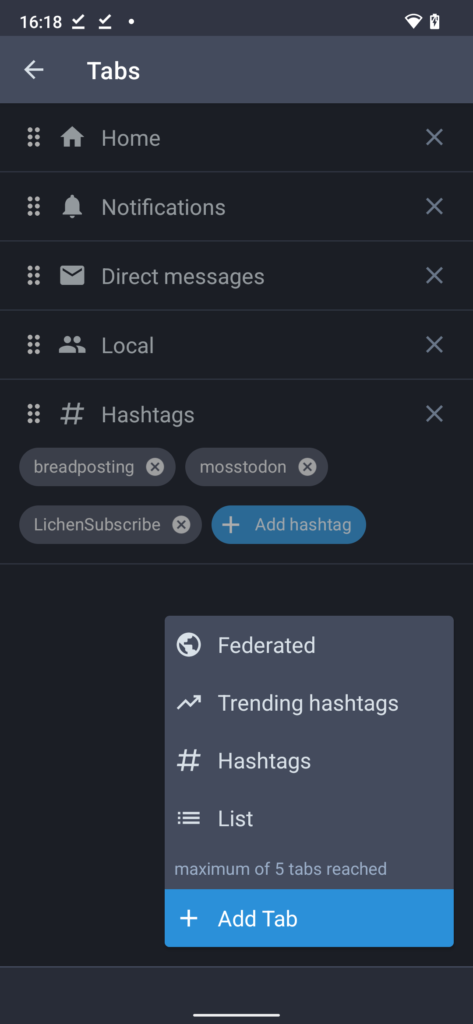
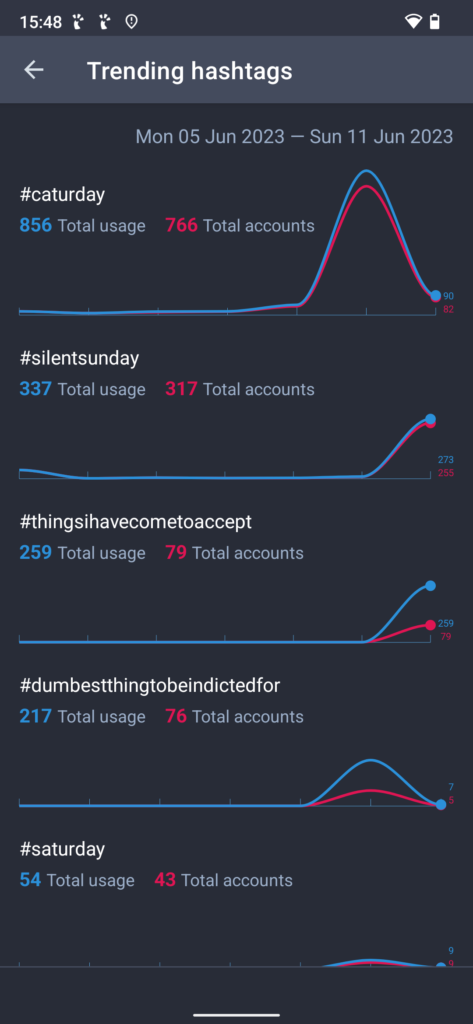
  • Custom tabs, you can pick up to five from Home, Local, Federated, Notifications, DMs, Trending Hashtags, Lists, Hashtag Columns
  • Hashtag tabs can include multiple hashtags in one tab, and you can have multiple separate hashtag tabs, which is really useful for creating your own custom themed timelines
  • Switch between tabs very easily by swiping (swiping can be deactivated too)
  • Support for multiple accounts at once, with separate settings pages for each account
  • People sick of clout-chasing can switch off all the boost/favourite/follower numbers, which can be good for mental health
  • Warning icon to remind you to add text descriptions

Potential drawbacks

  • No option to view trending posts
  • Custom tabs are fantastic, but the five tab limit can be frustrating
  • Verification of links on profiles not very clear, the icon could be confused with fake verification icons made with custom emoji
  • Profile descriptions formatted slightly messily, especially metadata elements
  • Some people overlook the Add Poll button as it’s sort of hidden in the attachment menu

Hints & Tips

  • Tusky is a volunteer-run project providing free software, you can donate to keep it going at the Tusky Open Collective page ⧉
  • To see your own profile page, tap your profile icon twice (once to open the settings page, then again to show your profile page)
  • To make a draft, start writing a post and close it without actually posting it . You can find a complete list of drafts from the settings page.
  • To add a poll, click the attachment button 📎 and then select Add Poll

↩ Back to the front page

Toot! for iPhone & iPad

Third party Mastodon app, closed source, available from Apple’s App Store (paid) ⧉

General impressions

Lots of personality, presented in a whimsical and fun style, not corporate at all.

Nice stuff

  • Mature and stable, one of the longest-maintained apps, been around longer than the official apps
  • Supports all timelines (home, federated, local), explore/trending tab, lists, hashtag following
  • Supports post editing
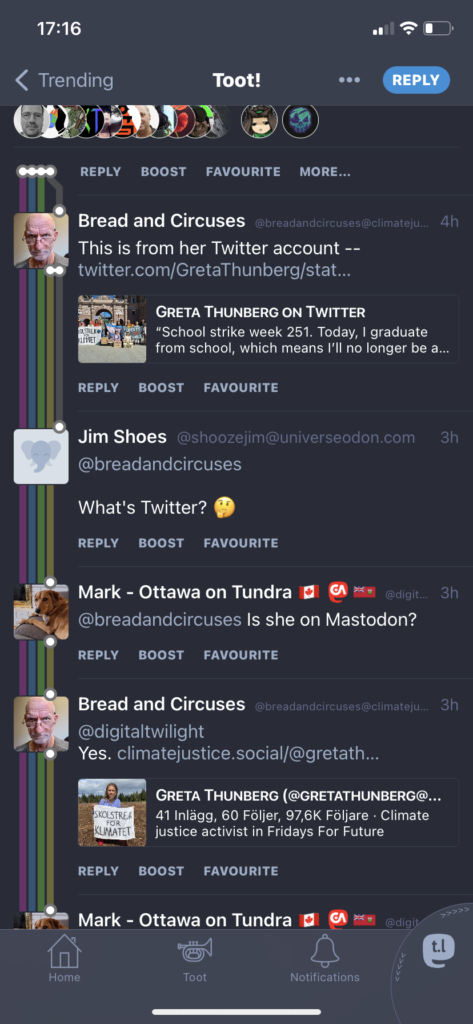
  • London Underground-style colourful discussion maps make threads much easier to navigate
  • Laid out clearly with text explaining things instead of blank icons, support for variable font size too
  • Allows multiple accounts at once and easy-to-use switcher in corner of screen
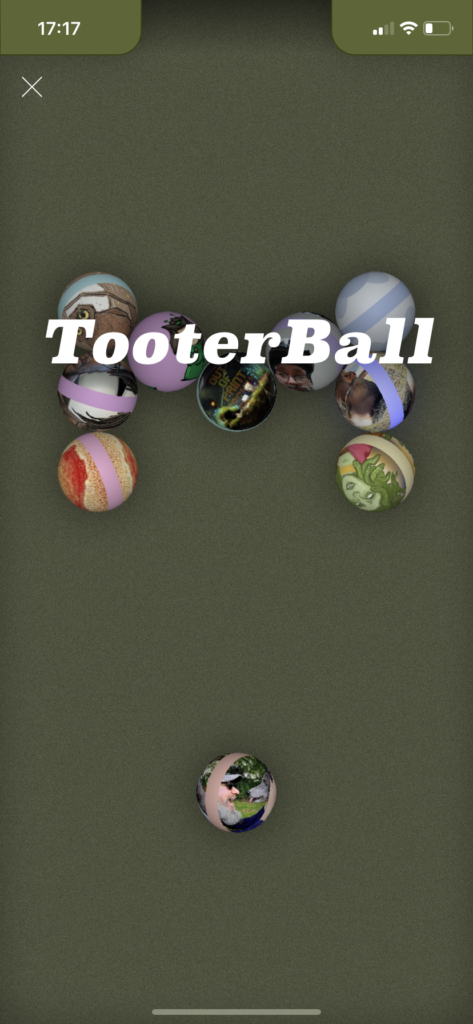
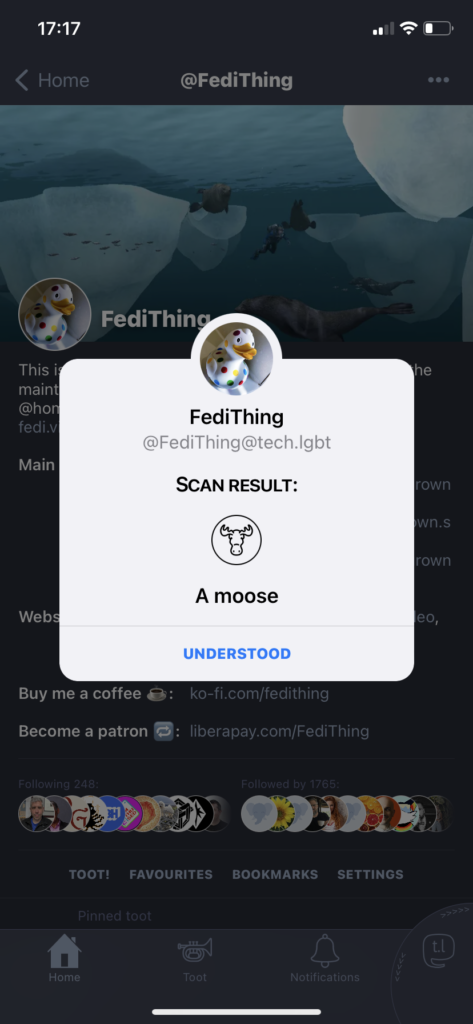
  • Unique and fun easter eggs including “user scanning”, a pool simulator with a mysterious scoring system and more
  • Timeline syncing between devices through iCloud
  • The “in-app purchases” are actually just parodies which you don’t need to buy, they don’t add any features

Potential drawbacks

  • Search box is awkwardly hidden in a menu
  • The message bubbles can feel a bit overwhelming when there are lots of them, but they can be switched off

Hints & Tips

  • You can find the search box by going to the Home or Notifications tab, then clicking ⋯ and then Search
  • To find the Explore, Local and Federated feeds, click your server’s icon in the bottom right corner and then select the feed you want from the menu at the top of the screen

↩ Back to the front page

Importing ready-made server blocklists on your own Mastodon server

Mastodon servers can choose to block other servers, and by default this is done manually one at a time. However, this can get cumbersome if there are lots of servers you need to block quickly, especially if you’re running a new server with no blocks at all yet.

To make the process easier, servers admins can import pre-written server-level blocklists from sites such as oliphant.social ⧉. Once you have a blocklist downloaded, here’s how to add it to your own server:

  1. Log in on your server’s website using your admin account.
  2. Go to Preferences > Moderation > Federation
  3. Click the Import button at the top
  4. Browse for the blocklist’s .csv file, then click Upload
  5. You will be presented with a list of servers to block. If there are servers with existing connections to your server, they will be automatically unticked. If you want to include these in the block, tick them.
  6. When you want to implement the blocklist, click Import in the top right corner of the list and click OK to confirm.

Once the list is successfully imported, the blocks will appear alongside your existing blocks. If necessary, you can remove blocks from the list just like any manually added block.

Will it block people that have already followed me, or that I already follow?

Before any blocks happen, the blocklist import process will highlight servers on the list that your server already has connections to. You will be given the option of either going ahead with blocking those servers, or leaving them off the blocklist. By default it will leave them off the blocklist, unless you choose to add them back in.

If you block a particular server, then all the follows and followers from that particular server will lose their connections to your server.

↩ Back to the front page

Deleting posts automatically in Mastodon after a certain time period

Posts in Mastodon can be set to automatically self-destruct after a certain time period, with exceptions made for posts you want to keep. Here’s how to do it:

  1. Log in through your server’s website
  2. Go to Preferences > Automated post deletion (on mobile you may need to click ☰ first)
  3. Choose the Age threshold to set how long posts are around before they’re deleted
  4. Set the exceptions for posts you want to keep
  5. Tick the box at the top marked Automatically delete old posts
  6. Click the Save changes button

If you want to stop deleting posts automatically, UN-tick the box and click the Save changes button.

I activated this but it hasn’t deleted posts that are way past the threshold. What’s going on?

If servers are busy, they create queues of tasks to work through. Automated deletion tends to go at the back of the queue, so it may take longer to happen than other tasks. If the settings are correct and it’s way past the deadline for the deletions to happen, ask your server’s admin for advice.

How does this affect server running costs?

When this feature is discussed, the issue of server running costs is often raised.

On the one hand, automated stuff always adds extra tasks for the server to carry out. On the other hand though, it would mean the server doesn’t have to store as much data so it would save money on storage costs, especially if the deleted posts have media attachments. It would also reduce storage for any servers that have federated the posts being deleted.

You would have to speak to your server’s admin to find out exactly how it affects their setup, as different servers may have different resources available.

I asked a couple of very large server admins for their thoughts on how this balances out. Both of them said the added tasks were insignificant compared to everything else the servers have to do. Both of them also said deleting posts (especially posts with media attachments) saves storage, but one of them added that there may be fees to be paid if the deletions happen for very recent posts. On their server, it would be cheaper to only delete posts more than 90 days old, and leave any newer posts intact.

↩ Back to the front page

How to use groups on Mastodon and the Fediverse

At the moment, most Fediverse groups work like this:

  1. Join a group by following its account address
  2. Posts from that group will start appearing in your Home timeline
  3. If you want to post something to the group, just include its account address in a public post
  4. If you want to leave a group, unfollow it

It’s somewhat similar to following hashtags, and people who have used email discussion lists will also find this structure very familiar.

The two main Fediverse group providers at the moment are Chirp ⧉ and Guppe ⧉. They are platform-neutral, and their groups can be followed from all kinds of Fediverse servers including Mastodon, GoToSocial, Friendica etc.

Where can I discover existing groups?

I’ve compiled a curated list of interesting Fediverse groups on fedi.directory ⧉. I’ve tried to only list active groups with a respectful atmosphere.

Chirp has its own directory at chirp.social ⧉, and Guppe has a list of their top 50 active groups at the bottom of their website at a.gup.pe ⧉.

How can I create a group? Are the groups moderated? What if I see something unsuitable?

Guppe groups don’t require any kind of registration, you can create a group simply by mentioning the group name in the form “@YourGroupNameHere@a.gup.pe”. However, because there’s no registration there is no way to moderate the group directly, and they rely on members reporting bad posts to their server admin.

Chirp groups require you to create an admin account on the chirp.social ⧉ website. Because groups have a registered admin, it means the admin can moderate the group themselves instead of relying on server admins.

What do I do if I see spam or something unsuitable in a group?

Whatever kind of group you are following, you can report, mute and block just like you would with non-group posts.

When you report bad posts, the admins on your server (and possibly also the server of the spammer/troll) can take action to block it and remove it.

Groups federate content more effectively than hashtags

Hashtag follows and groups have some overlap, and appear to work in a similar way on the surface, but there are significant differences behind the scenes.

The biggest advantage of groups is you automatically see all of the group’s posts, even if they’re from accounts that haven’t federated to your server before. Because all the group’s posts are shared to all the members’ servers, you never miss a thing.

With hashtag follows, this mass federation doesn’t happen. Hashtag following means you will only see posts from accounts that already federate with your server. Hashtags are essentially passive filters for your server’s Federated timeline and do not actively draw in any new content.

What about Mastodon’s own built-in groups feature?

Mastodon has been developing a built-in groups feature for some time now, but it hasn’t been released yet. From the screenshots posted so far, it seems it will be more of a Facebook Groups type forum rather than a public discussion list. (You can see highly technical details and screenshots of this upcoming Groups feature on their github page ⧉).

However, it is unclear if Mastodon groups will work across the Fediverse or only on Mastodon. Chirp and Guppe are platform-neutral, and will work on any kind of Fediverse server that supports microblogging including Mastodon, Friendica and others.

Groups on Friendica

The Fediverse server type Friendica includes built-in group support, which works in a similar way to Chirp and Guppe. Creating a Friendica group requires a Friendica account, but anyone can join the group from other Fediverse server types including Mastodon servers.

A Friendica group can be moderated by the person who created it, and they can also add additional moderators to the same group.

Is there anything like Reddit on the Fediverse?

Yes! There’s a Reddit-style link aggregation and discussion platform called Kbin.

↩ Back to the front page

You don’t need link shorteners on Mastodon

All links on Mastodon count as 23 characters towards your post’s character limit, no matter how long they really are. Because of this, there is no need to use link shortener services on Mastodon.

Mastodon does this because it’s much better for privacy that links remain in their original form, as link shortener services tend to track the people that click on them. It also means the links will continue to work in the future and aren’t dependent on the existence of the link shortener service.

The official iPhone/iPad app counts it as more than 23 characters?

There’s a known bug on the official iPhone/iPad app ⧉ which causes links to count for more than 23 characters. A fix has been proposed but it hasn’t been released yet. In the meantime, you can avoid this bug completely by using third party apps such as Toot!, Ice Cubes and Ivory, or by logging in through your server’s website.

But I want to track people who click on my links!

You can use link shorteners to track people, but you probably shouldn’t. Also, some people may wonder why you are using link shorteners when all links count for 23 characters anyway.

Why is it 23 characters?

Apparently Twitter’s original built-in link shortener used 23 characters. So when Mastodon removed the need for shorteners, they emphasised this by only counting 23 characters for all links.

↩ Back to the front page

Using relays and scripts to quickly expand a server’s view of the Fediverse

By default, brand new Mastodon and Fediverse servers will be totally blank, with no users or posts visible at all. Searches will produce no results.

As people start signing up and posting and following accounts from other servers, the timelines and search results will start to fill up as the server starts noticing more of the Fediverse. However, this discovery process can be very slow to begin with, and those on new servers may sometimes be frustrated by the slowness.

Server admins can speed up this process by subscribing to relays which push new content to their server from other servers, or using scripts that fetch missing posts from threads and profiles.

How to subscribe to a relay server on Mastodon

  1. Log into your server’s website using your server’s admin account
  2. Go to ⚙️ Preferences > Administration > Relays
  3. Click Setup A Relay Connection
  4. Paste the URL of the relay into the box and click Save And Enable

⚠️ WARNING: Some relays are better moderated than others. Some relays may contain content that breaks your own server’s rules, or may even be illegal in your country. It’s really important to check what kind of content a relay contains before you connect your own server to it. Relays are usually based on specific servers, so you can see such a relay’s content by browsing its server’s Federated feed and reading that server’s rules.

Also, bear in mind large and general relays may fill your server with content that you mostly aren’t interested in, and use up lots of resources at the same time. Smaller, more specific relays may be much better suited to your server’s resources.

Finding general relays

There’s a list of Fediverse relays at RelayList.com ⧉. Please bear in mind the warnings above before using this list, and check that the content on the relays is suitable for your server.

FediBuzz Relay: Custom relays on specific topics

This is a new service that lets you subscribe to custom relays based on specific hashtags or specific other servers. This can greatly reduce the amount of resources required by relays, as it only sends posts that are relevant to the topics you have selected for your server. You can find out more on its website at relay.fedi.buzz ⧉.

Using scripts to fill in missing posts from profiles and threads

There’s a new tool called FediFetcher ⧉ which can be used to automatically backfill missing posts from profiles and conversation threads. It runs independently of the Fediverse server, but it needs access tokens for every user that it backfills for, so it is generally aimed at single-user servers or servers where the admin knows all the users. It also requires good technical skills for running the tool.

↩ Back to the front page

How to post a poll on Mastodon

It’s really easy:

  1. Log in through your server’s website or on an app
  2. Start a new post
  3. Click the poll icon, this usually looks like a bar chart 📊 (on some apps there may be no poll icon visible, but you can click the attachment icon and then select poll as an attachment)
  4. Write your question in the main part of the post
  5. Add up to four responses, and describe each option (you can use emoji too). Some servers running customised code may allow more than four responses.
  6. Set the duration, between 5 mins and 7 days
  7. Click Publish to post the poll!

Allowing multiple responses on polls

There’s a slightly hidden option when you’re posting a poll where you can allow people to choose more than one response. To switch on multiple responses:

  1. Log in through your server’s website
  2. Create the poll via the web interface as described above, but don’t post it yet
  3. Click on a circle next to one of the options, the circles will all change into rounded squares, and the poll will now allow multiple responses

If you want to go back to single response, click on a square to change it back to circles before you post.

Some third party apps also allow you to activate multiple responses for a poll.

⚠️ Warning about editing polls

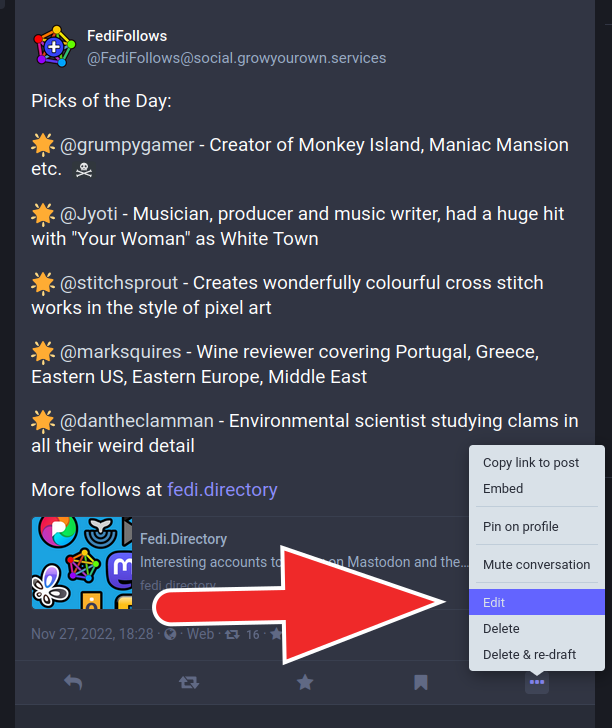
You can edit polls the same way you edit posts, just go to ⋯ on the post and select Edit. However, when you edit the poll’s options it will automatically reset the poll’s results back to zero without any warning! (Editing the main text above the poll doesn’t reset it though.)

This behaviour is presumably to prevent abuse of the poll system, but the lack of warning can really catch people out (it certainly caught me out! 😅 ). For those comfortable using Github, there’s an open issue about this here ⧉.

I can’t find the poll button on my app!

Some third party apps have the poll button hidden away under the attachment button. Click attach, and then instead of choosing an image or video or audio file, choose a poll.

↩ Back to the front page

How do I follow someone on Mastodon? How do I unfollow them?

You can follow someone on Mastodon by going to their profile page and clicking the Follow button.

You can unfollow them by clicking the same button again. The button may have a different label after you’ve followed someone (Unfollow, Following etc), but it will be in the same place on the screen.

If you’re trying to get someone’s profile page to appear so you can follow them, see the sections on discovering accounts to follow and using account addresses.

↩ Back to the front page

How do I delete a post on Mastodon?

To delete one of your posts:

  1. Go to the post you want to delete
  2. Click the ⋯ icon
  3. Select “Delete”

This should delete the post straight away on your own server. Most other servers where the post is visible will delete it too, though in some cases there may be a delay in the deletion happening (as the other server may have a queue of tasks to work through).

In a small number of cases a deletion may not happen on the other server, for example if the other server is not working properly. If you’re concerned about how widely a post may be seen, you can restrict its visibility when you post it.

What does “Delete and re-draft” mean?

There are actually two delete options on Mastodon, Delete or Delete and re-draft. The first just deletes the message, but the second deletes the message and sends a copy of it to the post writing box so you can make changes and repost it. However, since the introduction of post editing on Mastodon this second option has been largely obsolete. The only time you would be likely to want to use re-drafting is if you want to change the visibility of a post, as this cannot be done through editing.

Bear in mind that both delete options delete the post, and any shares will be lost, links will break and replies will be orphaned. If you just want to make changes to the content, editing is a much better option.

Can I set old posts to self-delete automatically?

Yes! Click here to see instructions on how to delete posts after a certain time period.

↩ Back to the front page

Recommending accounts to follow for new users on your Mastodon server

When a new user joins your Mastodon server, by default they are shown a list of accounts to follow. This recommendation list is drawn from two different places in the admin settings.

The first place is a manual list of accounts you want to always be recommended, which is always shown at the top of the list.

The other place is an automatic pool of accounts that are randomly recommended to new users. The pool is based on which accounts your existing users are following, but you can edit this pool if you want to remove accounts from it.

Set accounts that your server always recommends to new users:

  1. Log into your server’s website with your admin account
  2. Go to Preferences > Administration > Server Settings > DIscovery > Always recommend these accounts to new users
  3. Paste in the account addresses of the accounts you want to recommend, separated by commas. They can be accounts from your server or from other servers, as long as the account address is written in full.
  4. Click the Save changes button

Edit the random pool of recommended accounts:

  1. Log into your server’s website with your admin account
  2. Go to Moderation > Follow Recommendations
  3. To remove an account from the pool, tick the box next to it and click Suppress follow recommendation
  4. To bring an account back into the pool, click the Suppressed link at the top of the list, then tick the account you want to bring back and click Restore follow recommendation
  5. You can set different recommendation pools for different languages by clicking the For language dropdown menu

↩ Back to the front page

How to add custom emoji to your own Mastodon server

One of the most fun features of running your own Mastodon server is the ability to add custom emoji. All members of your server can use them, and they will be visible in your member’s posts that federate to other servers. You can also clone custom emoji from other servers, or block them if you see something unsuitable.

To access emoji settings, log into your server’s website with your administrator’s account, then go to Preferences > Administration > Custom emoji.

When you first log in, you will see a long list of all the custom emoji visible to your server, including your own and those of all the servers you federate with. To show just your own click the Local tab at the top, to show just those on other servers click Remote.

Adding your own custom emoji

Custom emoji can be PNG or GIF files up to 50kb in size, and can be still or animated. They can also contain transparent backgrounds. (If you want to create your own from scratch, there’s a useful guide by Laura Kalbag here ⧉.)

To add your own custom emoji:

  1. Log in with your admin account on your server’s website
  2. Go to Preferences > Administration > Custom Emojis
  3. Click the Upload button in the top right corner
  4. Add a shortcode, which is a word or words which describes what the emoji looks like. If you use several words, write them as CamelCase or with underscores separating them. Shortcodes are really important as they let blind people hear emoji through screen reader apps.
  5. Browse for the image file and click the Upload button at the bottom

Cloning emoji from other servers

To clone an emoji from another server, tick the box next to it on the custom emoji admin list, and click Copy. If you’re looking for a particular emoji on a long list, use its shortcode in the search box.

Blocking emoji from other servers

To block an emoji from another server, for example if it is offensive, tick the box next to it on the emoji admin list and click Disable or Delete.

↩ Back to the front page

Customising your Mastodon server’s appearance with CSS

You can give your Mastodon server’s website interface a unique appearance by using the Custom CSS feature:

  1. Log into your server’s website using the admin account
  2. Go to Preferences > Administration > Server Settings
  3. Click the Appearance tab and go to the Custom CSS section
  4. Add the CSS code you want in the box, then click Save Changes

If you’re comfortable editing CSS, have a look at this excellent tutorial for customsing a Mastodon server’s colour scheme ⧉.

↩ Back to the front page

What do I call my server? What kind of domain name or subdomain should I use?

When a Fediverse server is created, you have to give it its own name. This can be a domain name (example.com) or subdomain (social.example.com). People can use this server name when signing into their account on an app, or when using the server through a web browser.

The best domain names are usually short, easy to spell and memorable. You may want to avoid offensive words, as they can make it difficult to tell people about your server on other platforms. If you already own a domain, you can use subdomains for your servers.

It’s also probably a good idea to use a name that doesn’t mention the software that it is running. For example, if you were making a Mastodon server you probably shouldn’t mention the word Mastodon in the domain or subdomain. Software projects tend to change over the years, in their content, leadership or maintenance, and it may be that in the future you want to switch to a different kind of software on your server. It could be confusing for your users if your server mentions one kind of software but runs another. Alternatively, software projects sometimes rename themselves, and this too can cause confusion for your server’s users. On top of this, some software projects trademark their names and only let servers use the name if they’re running that specific software. This could make it legally difficult for your server to transition to another kind of software in the future.

↩ Back to the front page

How do I create my own server on Mastodon and the Fediverse?

There are three different ways you can make your own server on the Fediverse:

  • Easiest by far is to use a managed hosting service, where you pay a monthly fee to the hosting company and they do all the technical stuff behind the scenes, including installation, upgrades, maintenance etc. This is so easy that it allows non-technical people to have their own servers. You can find out a lot more about this by visiting my other site Grow Your Own Services, especially the section on growing your own social network ⧉.
  • A medium difficulty option is getting a VPS or home computer and installing special software intended for people who run their own servers, such as YunoHost ⧉, FreedomBox ⧉ or LibreServer ⧉. This requires some technical knowledge, especially to install the software, but after the initial set-up the process the rest is done through a graphical interface and relatively painless.
  • The most difficult option is to install and maintain everything from scratch. This demands the most technical knowledge, but also provides the most flexibility. You can find installation instructions for all Fediverse platforms in their documentation, usually on their official website. For example, Mastodon’s installation instructions are here ⧉.

Some Fediverse server types are available to set up through all three options, others may only be available by manually installing from scratch.

↩ Back to the front page

Mastodon API: Using Mastodon apps with non-Mastodon accounts

Mastodon uses an open API for its servers, which means that anyone can write a Mastodon app and it can make full use of all of Mastodon’s features. This openness means third party Mastodon apps get just as much access to Mastodon’s features as official apps do, and many third party Masto apps are actually better than the official one.

However, a side-effect of this openness is that non-Mastodon Fediverse platforms can also make themselves compatible with the Mastodon API. This means that Mastodon apps will work with those non-Mastodon Fedi platforms too. For example, you can sign in on a Mastodon app using your PixelFed account.

Not every Fedi platform supports this, but many do. The easiest way to find out whether it works is to download a free Mastodon app and try signing in.

(It should be noted that Mastodon’s developers don’t officially support this, and if it stops working you need to check with the maintainers of your Fediverse platform. They probably need to update their software so that it remains compatible with the Masto API.)

↩ Back to the front page
Adjusting photo previews on Mastodon so they look nice

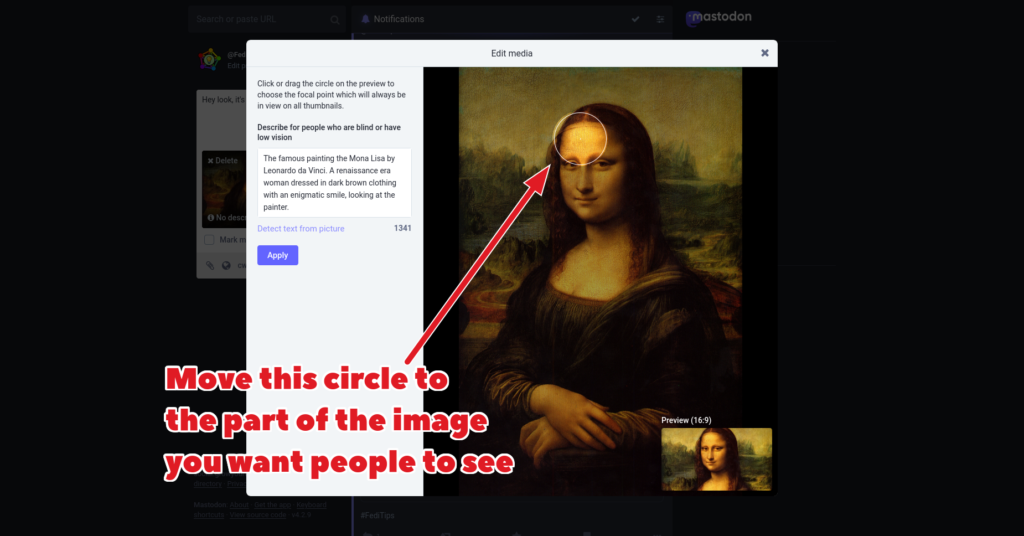
If you’re posting a photo on Mastodon through your server’s website, click Edit on the photo before you actually post it. This will allow you to add a text description for blind people, and it will also let you adjust how the photo is cropped in the compact version of the post which is visible in people’s timelines.

Photos that have a 16:9 aspect ratio will not be cropped on the timeline, so you don’t need to adjust them at all (but do still remember to add a text description to keep them accessible!).

↩ Back to the front page
Creating draft posts on Mastodon

Some third party Mastodon apps have a built-in draft posts feature.

There is no official drafts feature in the Mastodon website interface, but unofficially you can use the Delete & re-draft option combined with DMs to create drafts:

  1. Log on through your server’s website and create your draft post, but don’t publish yet.
  2. Set visibility to mentioned people only, and don’t mention anyone.
  3. When you’re ready to save it, publish it.
  4. When you want to edit it, go to your Direct Messages tab and find the draft.
  5. Click the draft open, click ⋯ and select Delete & re-draft, the draft will open in the message editing window
  6. When you’re ready to publish for real, set the visibility to the correct setting and add any mentions you want, then press the Publish button.

…but, as many people have pointed out, it might be easier to just use a notepad app and copy and paste drafts from a text file on your computer or phone 😁

↩ Back to the front page
Why does it say “Follow request sent” when I try to follow an account?

On the Fediverse, and especially on Mastodon, if you try to follow an account it sometimes says you’ve followed them but then it turns into a “follow request sent” message.

Usually, this means you’ve tried to follow an account that needs manual approval of followers, and you have to wait for the owner to approve your request. You can tell if an account requires approval as it will have a padlock icon 🔒 on its profile next to the username.

They don’t have follow requests switched on, so why does it say they do?

Sometimes this message appears even when the account you’re trying to follow doesn’t have manual approval mode switched on. In this case, the message may be caused by several other things:

  • A software bug which has prevented the follow going through properly. This kind of bug is especially common if you’re trying to follow an account on a new or experimental type of Fediverse server.
  • A server is overwhelmed with new members signing up all at once, and struggling to keep up with all the requests it is receiving.
  • The server of the person you’re trying to follow has silenced your server. This restricts communications between the two servers.

If you see that an attempted follow has turned into a follow request but the other account doesn’t have requests switched on, try leaving it for a while as it may just be a temporary glitch. If that doesn’t help, try cancelling the follow completely, wait for a while and then try clicking follow again, which sometimes helps the follow to go through properly. If it still doesn’t work, contact your own server admin, and if they can’t help try contacting the admin of the server for the account you’re trying to follow.

↩ Back to the front page
Making your posts visible to a wider audience on Mastodon and the Fediverse

Due to the way the Fediverse currently works, if you publish a post while you still have zero followers, that post will probably not be visible to anyone except people on your server. When people follow you, they will see your posts from that moment onwards, but there’s generally no backfilling to show them your previous posts.

On Mastodon, you can make everyone see past posts by pinning them to your profile. Pinned posts are backfilled and will become visible to anyone who follows you. You can pin up to five posts at once, and they will all be backfilled. Unpinned posts will not be backfilled though.

In general it’s a good idea to wait until you have at least some followers from other servers before you publish your most interesting stuff. Even a handful of followers will give your posts much more visibility across the Fediverse, as you only need one follower from a server to make your posts visible to that entire server.

↩ Back to the front page
Why does someone’s account page look completely blank? Is it really blank?

It may or may not be blank.

Fediverse servers work like this: servers only notice accounts from other servers if someone follows or interacts with them. If no one on your server has ever followed an account on another server, the account may appear blank to you.

The reason servers work like this because of resources. If servers had to keep a copy of every post from every user on all the thousands of Fediverse servers in the world, their running costs would become prohibitively expensive (and most of those posts would probably never be read anyway). This means people on very new or very small servers may sometimes see blank profiles even for popular accounts that have been around a while.

Viewing the latest and most complete version of an account

To check what the profile really looks like, log in to your account through the website, go to the profile, click on ︙ and then “Open original page”. This should open the profile in a new tab on its home server, which will show all the public posts the account has ever made.

Unfortunately, original pages on other servers are more difficult to interact with. By default your have to enter your username and password each time, though there are ways to make it much easier.

Backfilling to the rescue?

Fortunately there may be a possible solution on the way called “backfilling”. This would mean as soon as you follow someone your server would automatically check the account for past posts and display some or all of them on your server. With backfilling there would never be blank profiles, and there would be much less need to fiddle around with original pages. At time of writing backfilling is the most popular suggestion on the Mastodon github site, and if you’re comfortable using github you can go and give it a thumbs up ⧉.

How to prevent your profile from ever looking blank

If you pin some of your posts to your profile, these will automatically be backfilled, and your profile will never appear blank to anyone. You can pin up to five posts on a profile, and these can include attached photos, video and audio, so they’re a great way of introducing your account to potential followers. Click here to find out how to pin posts.

Accounts with restricted post visibility

An alternative reason why a profile might be blank is this: if the account has follower requests on (indicated by a padlock 🔒 next to their name), and all its posts are followers-only, then you will not see any posts on their profile until you follow them and your follow request is accepted.

↩ Back to the front page
Why aren’t all Mastodon and Fediverse posts and accounts automatically visible from all servers?

There are tens of thousands of Fediverse servers with millions of users in total, and this amount is growing all the time. There are hundreds of millions of posts going back almost a decade.

It would be horrifically expensive for every independent server to keep a complete, up-to-date record of every post ever made by every user on every other server. The only people who could afford such a system would be megacorporations like Facebook, Google, Twitter etc.

The whole point of the Fediverse is to allow small independent servers to exist as part of a larger network, so that the network is as spread out as possible (click here to find out why this is a good idea). The smallest Fedi server starts from about US$10 a month to run, and this low cost is possible because the server only needs to display posts and shares from people its users follow. Even the largest Fediverse servers are able to operate on a fraction of the budget of a commercial social network because they are only showing posts their users have to see. (If you’re interested, there’s a complete list of what a server can see here.)

Couldn’t Mastodon at least show a few old posts instead of blank profiles?

Having said all of the above, there are definitely ways that the current system of federation could be improved. One feature currently missing from the Fediverse is “backfilling”, where an account’s old posts are automatically loaded to a server when someone on that server follows an account. At the moment you only see posts made by an account after at least one person on your server has followed it, but with backfilling their past posts would become visible too. (Incidentally, Mastodon does already backfill pinned posts.)

The main thing preventing backfilling from being used has been concern about stress on servers, especially if an account has thousands of past posts to backfill. A possible compromise might be letting servers decide for themselves if they will allow backfilling, and how many posts they are willing to backfill. Perhaps smaller servers could allow at least a few posts to be backfilled in order to avoid possible blank profiles.

If you’re comfortable using Github, you can let the developers of Mastodon know you want some kind of backfilling to be possible by giving a thumbs up on the relevant issue ⧉, and if you have your own ideas you can contribute to the thread.

↩ Back to the front page
Which Mastodon and Fediverse posts and accounts can I see from my server?

If you are searching for something on Mastodon and the Fediverse, you will get different search results depending on which server your account is on. This is because each server sees a slightly different view of the Fediverse.

Your server can see the following content:

  • All accounts on your server
  • All posts made by accounts on your server
  • All posts shared by at least one account on your server
  • All accounts that at least one account on your server follows
  • All posts made by accounts that at least one account on your server follows
  • All posts shared by an account that least one account on your server follows
  • All posts from groups which have at least one follower on your server
  • All posts that have been searched for by their original page’s web address
  • All accounts that have been searched for by their account address
  • All posts pushed to your server by a relay server (if your server uses relays)

How do I make my server notice more posts and accounts?

If a post isn’t visible from your server but you know it exists, you can manually force your server to notice it by copying and pasting the post’s URL from its original page on its home server into the search box on your server. This will make the post appear within your server so you can interact with it and search for it just like any other post. Click here for more details about original pages.

If you want your server to notice a lot more posts and accounts, ask your server admin if they have considered using a relay service. Modern relay services can be for specific topics, and scripts can be used to backfill missing posts from profiles and conversations.

Why doesn’t my server just notice all posts and accounts from all servers?

Fediverse servers are selective about what they see, because keeping a complete copy of all posts from all other servers regardless of whether they’re needed would be incredibly expensive and wasteful.

Can a server stop noticing posts and accounts?

Yes, if the server’s admin decides to defederate from another server. When a server defederates from another server, it can no longer see posts or accounts from the defederated server.

Alternatively, a server admin may instead decide to suspend a specific account on another server, which will make that account and its posts no longer visible on the admin’s server.

↩ Back to the front page
Muting conversation threads in Mastodon

On Mastodon, if you have posted in a thread or been tagged in it, but you don’t want to take part any more, you can mute the conversation so that you won’t get notifications from it. No one will know you’ve done this, and it will only affect that thread:

  1. Log in through your server’s website (and some apps also include this feature)
  2. Go to one of your posts in the thread you want to mute
  3. Click ⋯ and select Mute conversation
  4. If you haven’t posted in the thread, go to a post in the thread where you were tagged, then select ⋯ and Mute conversation
  5. If you still can’t find this option, go to your Notifications section, then click ⋯ and Mute conversation on one of the conversation’s posts there

If you change your mind, just do the same thing again but select Unmute conversation.

↩ Back to the front page

Hiding someone’s boosts in Mastodon without blocking or muting them

On Mastodon, if you follow someone and you want to see their posts but not their boosts, you can hide just their boosts without blocking or muting them. This doesn’t affect their normal posts, and they have no way of knowing you’re doing it.

Log in on your server’s website, and go to the profile of the person whose boosts you want to hide. Click on the ︙ button and select Hide boosts from. If you change your mind, go back to their profile and select Show boosts from.

This only works on accounts you follow.

↩ Back to the front page
How to avoid accidentally unfollowing, boosting or deleting in Mastodon

You can optionally have Mastodon ask you for confirmation when unfollowing someone, boosting a post or deleting a post.

You can switch these confirmations on or off by logging in through your server’s website, then going to Preferences > Confirmation dialogs, tick the boxes for what you want confirmation for, then click Save changes.

↩ Back to the front page
Customising Mastodon polls to allow multiple selections

The default poll on Mastodon allows people to select just one option. However, you can customise the poll so that it allows multiple options to be selected.

Log in through your server’s website, and create the poll as normal, but don’t post it yet. Click on one of the circles next to the options. The circle will change into a square, and the poll will now allow multiple option selection.

If you change your mind, click on a square to change it back to a circle, which means single option selection.

↩ Back to the front page
Why do some people on Mastodon and the Fediverse have bigger character limits?

Most people on the Fediverse are on a standard Mastodon server, which has a 500 character limit for posts.

However, a lot of people are on servers running customised versions of Mastodon where the admin has altered the character limit, or they are on non-standard “forked” versions of Mastodon such as Glitch ⧉ and Hometown ⧉, or perhaps on completely different Fediverse server types that aren’t Mastodon at all. These other kinds of servers may have totally different character limits, sometimes in the thousands, tens of thousands or even hundreds of thousands.

Despite their differences, these servers are all part of the Fediverse and you will see posts from all kinds of servers appear on your timelines. If it is a particularly long post, you may see it truncated on your timeline with a “Read more” link you can click on to show the full text.

↩ Back to the front page
How to activate Mastodon’s Tweetdeck-style Advanced Web Interface

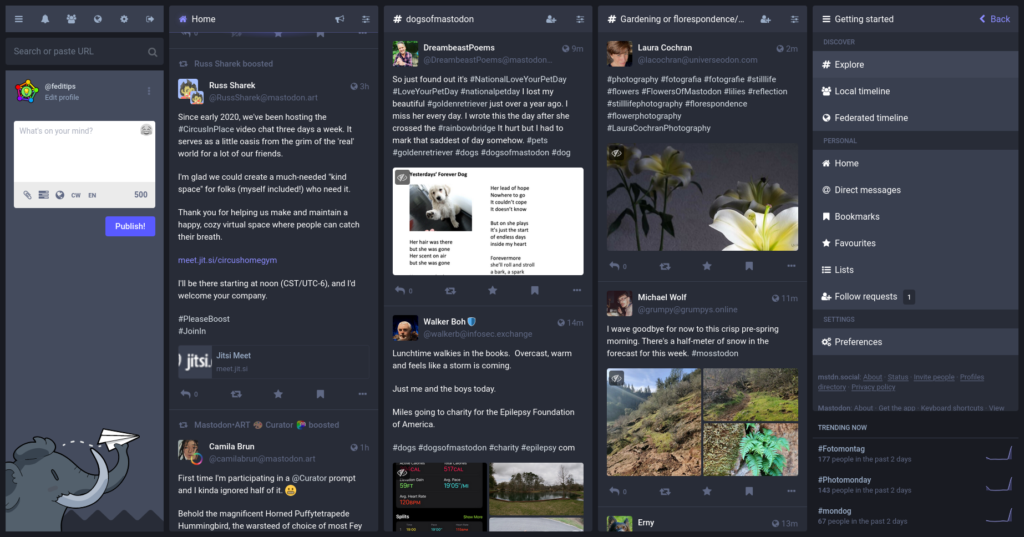
Screenshot of the Mastodon multicolumn advanced web interface, showing five colums with a posting box, timeline, pinned hashtag searches and various links to features.
Screenshot of the Mastodon multicolumn Advanced Web Interface

By default, Mastodon servers’ websites use a simple single column interface.

However, if you’re using the website through a computer (or a tablet/phone in horizontal mode) there is also an optional multicolumn interface you can use instead. Here’s how to activate it:

  1. Log in through your server’s website as usual
  2. Click ⚙️ Preferences
  3. Tick the box marked Enable Advanced Web Interface and click the Save Changes button
  4. Click the Back to Mastodon link at the left of the screen

If you’re already in multicolumn and you want to go back to the normal single column interface, here’s how to do it:

  1. Click on the ⚙️ cog gear icon
  2. UN-tick the box marked Enable Advanced Web Interface and click the Save Changes button
  3. Click the Back to Mastodon link

Pinning columns on the Advanced Web Interface

When you first use it, the advanced web interface only contains four columns with one of these columns dedicated to whatever you last selected. Every time you select something, it replaces the contents of this fourth column.

However, if you want to keep a column permanently visible you can pin it:

  • To pin a column, click on the slider icon in the top right corner of the column and select Pin.
  • To unpin a column, click the slider same slider icon and select Unpin

When you pin a column, it expands the interface sideways, and some people have lots of pinned columns. Pinning is well suited to widescreen monitors, and you can scroll the interface sideways to see any columns that don’t fit on the screen.

Advanced hashtag searches with pinned columns

If you pin a hashtag search and then click the pinned column’s slider icon again, you will see some additional options which let you combine hashtag searches into the same column with special filters:

  • Any means it will show posts that contain one or more of those hashtags
  • All means it will show posts that contain all of those tags
  • None means it will hide posts containing those tags

Using Advanced mode through your keyboard

The Mastodon web interface can be controlled almost entirely through your keyboard, click here to see the section on hotkeys for more details. These hotkeys also include some commands that only work in Advanced mode.

Why are there two interfaces?

The original website version of Mastodon from 2016 used the multicolumn interface, but while some enjoyed it others found it confusing and overwhelming. Eventually a simpler single column interface was introduced, and single column became the default. The multicolumn interface was renamed “advanced” and made available as an optional mode in settings.

↩ Back to the front page
Why are some accounts marked “Bot” on Mastodon?

On Mastodon, if you’re running an account that isn’t monitored by a human, it’s considered polite to mark it as a bot.

You can add the “bot” label to an account by signing in through the website and going to Edit profile > This is a bot account, then tick the box and click Save changes.

It’s not a pejorative term, it’s just used as a neutral label for accounts that post regularly but don’t have a human being replying.

Bot accounts can be very useful or entertaining, for example the How To Do Anything bot ⧉ is entirely automated but many people enjoy following it. Some bot accounts do interact, such as the Text Adventure bot ⧉, but there is no human being doing the interaction so they use a bot label.

↩ Back to the front page
Following Mastodon and Fediverse accounts through RSS

Some types of Fediverse servers let you follow their accounts through RSS newsreader apps.

On Mastodon, you can follow any account through RSS by going to the account’s original page and adding .rss to the end of it. For example, the RSS feed for the FediTips account is https://mstdn.social/@feditips.rss ⧉. Note that this only shows public posts, you will not see replies or followers-only posts on the feed.

On PeerTube, you can follow any account or channel through RSS by going to its page and clicking the Subscribe button, there will be an RSS subscription option at the bottom of the menu. You may also see RSS logos next to various features that give you RSS feeds for those features.

↩ Back to the front page
How to embed Mastodon posts on a website

It’s really simple:

  1. Log in through your server’s website
  2. Go to the post you want to embed
  3. Click ⋯ at the bottom of the post, then select Embed
  4. Copy and paste the HTML code into your website’s page code

This works on any site, blog, or other service that accepts HTML code in posts. For example, news website The Verge embedded a post from Mastodon in this story ⧉.

Embedding on WordPress sites

If you’re using WordPress, don’t use WordPress’s “Embed” block. Instead, use WordPress’s “Custom HTML” block and paste Mastodon’s HTML embedding code there.

If you want to embed a Mastodon account’s public feed on a WordPress site, you can use WordPress’s “RSS” block and insert the Mastodon account’s RSS feed address.

↩ Back to the front page
Using Mastodon through a keyboard

If you’re using Mastodon through your server’s website on a computer, you can control it almost entirely through your keyboard. Particular keys will carry out particular functions, and you can type emoji too.

Hotkeys on Mastodon

Hotkeys are always on, press shift + ? (or just ? on some keyboard layouts) to see a complete guide to which keys do what.

Note that some of these keys are only useful in the advanced web interface (multicolumn) mode, but most of them can be used with the default single column mode.

For your convenience, here’s the complete list:

rReply to post
mMention author
pOpen author’s profile
fFavourite post
bBoost post
enter, oOpen post
eOpen media
xShow/hide text behind CW
hShow/hide media
up, kMove up in the list
down, jMove down in the list
1-9Focus column
nFocus compose textarea
alt+nStart a new post
alt+xShow/hide CW field
backspaceNavigate back
sFocus search bar
escUnfocus compose textarea/search
g+hOpen home timeline
g+nOpen notifications column
g+lOpen local timeline
g+tOpen federated timeline
g+dOpen direct messages column
g+sOpen get started column
g+fOpen favourites list
g+pOpen pinned posts list
g+uOpen your profile
g+bOpen blocked users list
g+mOpen muted users list
g+rOpen follow requests list
?Display hotkeys list

Typing emoji through a keyboard on Mastodon

If you’re using Mastodon on a computer, you can type emoji directly with your keyboard.

Just type : (colon) and a keyword without a space. A dropdown menu will appear with the top five matching emoji, and you can pick one with the arrow keys. For example :sun will bring up the top five emoji matching the keyword “sun”.

If there are more than five matches for a keyword, they will not all appear on the dropdown. If so, you’ll need to search for them from the picker icon 😂 in the top right corner of the editing box.

The keywords are based on the alt text of an emoji. If you’re wondering how to search for a particular emoji in future, find it in the picker and then hover your mouse over it. The alt text will appear, and you will be able to use this keyword to bring the emoji up using your keyboard.

↩ Back to the front page
Remote Following on Mastodon: Why does Mastodon keep asking me to log in again and again?

Remote following is where you go to an original page which is not on your own server, and click the Follow or Subscribe button there. By default, it will ask you to sign in again, because it’s asking your own server who you are.

This method is obviously pretty cumbersome, but there are several ways you can avoid having to sign in again:

  • If you’re using Mastodon through a computer, you can install the FediAct browser extension which lets you interact with original pages without having to log in again. You can get FediAct for Firefox ⧉ and FediAct for Chrome ⧉. This lets you do follows and also other interactions on the original page such as likes, replies etc.
  • Alternatively, if you have Firefox on a computer you can install the Simplified Federation add-on ⧉ which automatically signs you in when you’re doing a remote follow.
  • If you don’t want to install any extensions but you don’t want to have to sign in again and again, go to your own server’s website or your app, sign into your account as normal, then copy and paste the web address or Fediverse address of the account’s original page into the search box. This will bring up the same account profile but within your own server’s interface, where you can just click Follow. This method avoids having to do remote following at all, and you won’t have to keep signing in. After you’ve done this once, your server will remember the account and you will be able to find it again by just searching within your own server.

Remote following is meant more as a method of last resort, and you’ll find it a lot easier to follow people from other servers within your own server’s interface.

↩ Back to the front page
What are Original Pages in Mastodon and the Fediverse?

Every account and post on the Fediverse has an original version of itself on the server it comes from called an “original page”. This page shows the latest and most complete version of a profile or post. As well as letting you see an up-to-date version of itself, original pages can be really useful for many other purposes too.

Finding a profile or post’s original page

On Mastodon, here’s how you can see these “original pages”:

  1. Log in through your server’s website
  2. Go to a profile or post and click on ⋯ or ︙
  3. Select “open original page”, which will open the original page in a new browser tab

Once the page is open, the original page’s web address will be visible in the browser’s address bar at the top.

Checking if a blank profile really is blank

If no one on your server has interacted with a profile before, it may appear blank. You can open the profile’s original page to check if it really is blank.

Browsing a profile’s followers and follows lists

Sometimes a profile’s follows and followers may not be visible to your server, or it may be incomplete. If you go to the original page and click on the follows and follower lists there, you will see their complete versions. (However, note that some people deliberately keep their follows and followers lists hidden for privacy reasons.)

Using original page addresses to interact with posts and profiles

If there’s a profile or post that you can’t find by searching on your server, you can use original pages to force your server to notice people and posts it hadn’t noticed before, including pages from other types of Fediverse server. Just copy and paste the original page’s address into the search box on Mastodon, and it will make that post or profile appear within your own server, where you will be able to interact with it directly.

The process is cross-platform and works for any Fediverse server type. For example if you know the web address of a PeerTube video or Pixelfed photo, you can paste it into the search box on Mastodon and the video or photo will appear within Mastodon. You will then be able to interact with it as if it was a Mastodon post.

This process works in a very similar way to account addresses.

Sharing Fediverse content using original page addresses

Original pages are also useful if you want to share a profile or post with people outside the Fediverse, as you don’t have to be logged in to see them. Just give people the original page’s web address and it will open in any browser.

You can copy a link to an original page directly to your clipboard by going to a post, clicking ⋯ and then “Copy link to post”. This link goes to the post’s original page.

↩ Back to the front page
Crossposting between Mastodon and Twitter

You can automatically crosspost between Mastodon and Twitter in either direction using third party services. Crossposting means when you post on Mastodon the same content will also be posted on Twitter (or vice versa).

This can be controversial if you’re just mirroring your Twitter account to Mastodon without interacting on Mastodon at all. Some servers specifically ban such “zombie accounts”.

Going in the other direction, if you’re active on Mastodon and mirroring it to Twitter, there’s no controversy at all.

Which crossposting services are available?

Professional paid crossposting services such as Buffer ⧉ are still working.

However, most free crossposting services have shut down due to Elon Musk’s shutdown of Twitter’s free API.

↩ Back to the front page
Customising your notifications on Mastodon

On Mastodon, you can customise your notifications to adjust what they tell you about and how they tell you.

On your server’s website, go to your Notifications column and click on the slider icon in the top right corner. This provides lots of options to customise, and there are even more options if you scroll the menu down a bit.

On the official app, go to the main timeline and click on the cog / gear icon ⚙️, then scroll down to the notifications section. The official app’s options are more limited though, you will see a lot more options on the website version.

Third party apps will have various different interfaces for customising notifications, but they’ll usually be in their settings section.

↩ Back to the front page
I’ve written a link but it isn’t clickable, how do I make it clickable? What kind of links can I use on Mastodon?

If you want a clickable website link within a post or on a profile on Mastodon, remember to include https:// at the beginning when you’re writing it. This tells the server that you want the link to be clickable.

Twitter automatically changes anything with a dot in the middle into a clickable link, but this doesn’t happen on the Fediverse because some people want to include dots without making clickable links.

As well as website links, you can also use many other kinds of links. All of these will work as clickable links on Mastodon: https://, http://, gemini://, dat://, dweb://, gopher://, ipfs:// and ssb://

↩ Back to the front page
Choosing a good username on Mastodon and the Fediverse

Fediverse addresses have two parts, the username and the server name. However, by default Mastodon and some other Fedi server types hide the server part of the address within posts to avoid looking too messy. This means that it’s a good idea to choose something distinctive for a username, so that when people see your account mentioned in a post it is clear that you are being talked about.

For example, if there was an account with the address @MarvellousWidgets@example.com, only @MarvellousWidgets would be visible on posts, though clicking on it would lead to a profile page where the full address appears. This is a good distinctive username because people can refer to it in discussions easily, and a post might say “Have you seen the latest release from @MarvellousWidgets? It’s very useful.”
On the other hand, if there was an account that had a much more generic username such as @software@example.com, all that people would see of its address in posts would be @software which would be very unclear and unmemorable. A discussion would look like this: “Have you seen the latest release from @software? It’s very useful.”. People would have to click through the username each time to know who you are talking about.

Those users on their own servers may think their custom domain gives them enough distinctiveness. However, as people don’t see the domain part of Fedi addresses most of the time, even people on their own domain need to think about distinctive usernames.

Don’t use dots / full stops / periods in usernames

Some Fediverse platforms allow you to use . in usernames while others don’t.

If you use dots in your username, it may make it impossible for you to be followed from some types of servers, including Mastodon servers.

The safest option in this situation is to just completely avoid using dots in usernames.

↩ Back to the front page
How to use the Lists feature on Mastodon
Mastodon includes a Lists feature which lets you create mini-timelines based on accounts you follow. For example, you could create a list which just shows posts from artists you follow, or just news accounts, or whatever kind of theme you want. (Note that for safety and privacy reasons, you cannot add accounts you do not follow to lists. However, see the advice below for hiding the contents of Lists from your Home timeline.)

You can create and use lists on the website version of Mastodon, and on third party Mastodon apps like Tusky for Android or Metatext for iPhone/iPad. However, it is not currently possible on the official app.

To create a list on the website interface using a computer:

  1. Open your profile page, then click on the section marked Following.
  2. Browse through the accounts you follow. When you find an account you want to add to a list, click on their name to open their profile page.
  3. On the profile of the person you want to add, click on the ︙ symbol and select Add or remove from lists. This will cause the Lists editor to open.
  4. If you want to add the person to new list, type a name for the new list into the white box marked New list title and then click the + sign next to the new list’s name. Alternatively, you can just click + next to an existing list’s name.
  5. Click anywhere outside the Lists editor box to close the editor.
  6. A link to your list will be visible on the right side of the screen. To see your list’s timeline, just click on its name. Lists start out empty but you will see posts on the list when someone on that list publishes their next post or boosts something.
  7. To edit or delete an existing list, click on the list’s name to open it and then click on the slider icon in the top right corner of the list. This editor also includes a search box for searching accounts you follow, if you prefer to add accounts to your list that way.

…and that’s it! You now have all the tools you need to use lists on Mastodon!

By the way, third party apps will have slightly different interfaces for lists, but it’s the same feature.

Can I view accounts on Lists without them appearing on my Home timeline?

Yes! Starting on Mastodon version 4.2.0, you can hide posts by accounts on your lists from appearing on your Home timeline:

  1. Log in through your server’s website
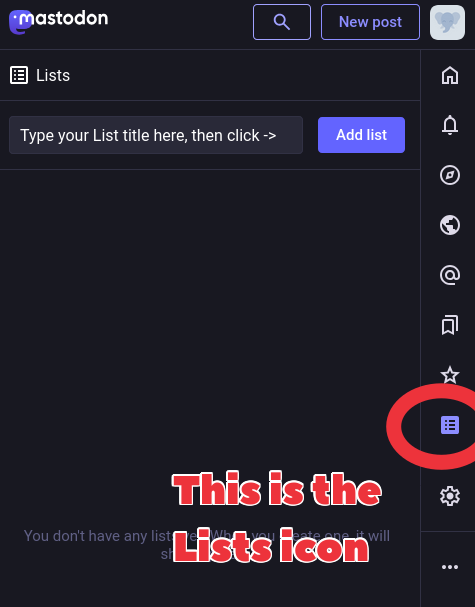
  2. Go to the Lists section
  3. Click on the list you want to hide on Home
  4. Click on the slider icon in the top right corner
  5. Select Hide these posts from home

This means you can have lists that are entirely separate from your Home timeline.

Why do I have to follow accounts that I add to Lists?

The following requirement is for the sake of safety and privacy.

On some social networks such as Twitter, list features have been misused by trolls and bullies to make lists of victims.

On Mastodon, the follow requirement gives people more control over being listed. If an account has follow requests activated, it lets them control whose lists they may end up on, and if an account blocks someone that also prevents them being added to that person’s lists.

↩ Back to the front page

Using multiple accounts on Mastodon and the Fediverse

First of all, it’s worth saying that most people do not need to use multiple accounts. The Fediverse is designed in such a way that people on different servers can interact seamlessly, as if they were all on one network. For most people, one account is enough, because it lets you interact with people on the whole network.

However, some people may need separate personal and work accounts, or an extra account that focuses on a specialist topic which they wish to keep separate from their main account. Also, some server types are specialised in particular kinds of content, and people may have multiple accounts on multiple server types.

Whatever your reasons, it’s very easy to use multiple accounts on Mastodon and the Fediverse! Here are some tips:

  • If you are going to have multiple accounts, it’s strongly recommended that you sign up on a different server for each account. Because the servers are independent, you can use the same email address for all of them and you can be signed into all the accounts simultaneously on the web and on apps. Signing up for accounts on different servers also means that if one server goes down your alternative accounts will still work.
  • If you use the Fediverse through the web, you can log into all the accounts at once and switch views by keeping each account open in a separate tab.
  • Official and third party apps let you be signed into multiple accounts at once, and switch between them whenever you want. The interface for switching differs from app to app.
  • On the official Mastodon app, you can add accounts and switch between them by holding down your profile image in the bottom right corner. A menu will appear which lets you add or switch accounts.

↩ Back to the front page

How can Mastodon server administrators automatically remind their users to add text descriptions?

If you run a Mastodon server, you can add a special chunk of custom CSS to your server which causes image posts without descriptions to have a red border.

To do this, go to Preferences > Administration > Site Settings > Custom CSS and then add the code from here ⧉.

↩ Back to the front page

How do I add a text description through Mastodon’s edit feature?

There used to be a bug in the edit feature which prevented descriptions being edited. However, the bug was fixed in Mastodon version 4.1.0, so as long as your server is running 4.1.0 or higher then you should be able to edit descriptions just like you would edit the rest of the post.

You can see which version your server is running by going to your server’s website and looking at the bottom of the screen. If you’re on a phone browser, you may need to tap the ⋯ icon and then scroll to the bottom of the screen.

If your server is still running an older version of Mastodon, there is a workaround which does let you add descriptions through editing:

  1. Edit the post
  2. Delete the image
  3. Re-upload the same image
  4. Add the text description
  5. Save changes to the post

↩ Back to the front page

How do I remember to add text descriptions on Mastodon and the Fediverse?

If you’re not used to adding text descriptions, it’s unfortunately quite easy to forget. However, help is available! If you follow the Please Caption bot at @PleaseCaption@botsin.space ⧉, it will automatically tell you if you’ve forgotten to add a text description.

Text descriptions are expected on the Fediverse, it’s seen as good manners to be considerate of screen reader users. By the time you’ve been doing it for a while, it becomes second nature.

↩ Back to the front page

How do I make posts more accessible to blind people on Mastodon and the Fediverse?

There are a lot of people on Mastodon and the Fediverse who use screen readers to convert text into audio, including blind people, partially sighted people and those with many other disabilities. There are five easy things abled people can do to help screen readers work better with what they’ve posted:

  • When posting an image or video, click on the “edit” or “caption” button (or write directly on top of the image on some apps) and then add a text description of what is visible. Read it to yourself afterwards, and see if you are able to imagine the important parts of the picture from what you have written. When you’ve finished, remember to click the “Apply” button if if necessary.
  • When posting hashtags, use CamelCase (where each word begins with a capital letter), for example #DogsOfMastodon instead of #dogsofmastodon. The capital letters allow screen reader apps to separate the words correctly and read the hashtag out loud properly.
  • Don’t do that “sarcastic text” thing where you make fun of someone by having random letters as capitals, because random capitals prevent a screen reader from working properly.
  • If you’re sighted and you see the hashtag #Alt4Me underneath an image post, it means a blind person wants you to write a description of the image. Reply to the post with the tag and give them the description.
  • Also, if you’re a sighted person and you see a remarkable image that doesn’t have a descrption and no one has requested one yet, be pro-active and reply with a description using the tag #Alt4You which will let blind people find your description more easily.

Note that sometimes an image may have no description but there is an #Alt4Me tag added to it by the poster. It may be that the poster is unable to add a description (for example due to having a disability themselves), but is aware that one is needed so they have pre-emptively added the tag.

↩ Back to the front page

How do I use Mastodon through a screen reader?

Mastodon can be used through screen reader software that converts the text into audio. Here are some useful guides written by blind Mastodon users:

↩ Back to the front page

Creating an isolated server on Mastodon and the Fediverse

Servers on the Fediverse don’t have to communicate with each other. They can be run as totally isolated silos if the owner wants, and some people do this to get an extra layer of user safety.

If you want to do this with Mastodon, there’s a web page with instructions and tips here ⧉ and there’s a technical description of “Limited Federation Mode” ⧉ in the official documentation.

↩ Back to the front page

“Authorized Fetch”

This is a bit technical, but there’s a little-known feature on Mastodon called “Authorized Fetch”, aka “Secure Mode”. By default it is switched off as it uses more resources and can cause compatibility problems with servers running older software.

However, if it is switched on it makes user blocks more effective, as it makes it harder for blocked people on other servers to interact with public posts from people who blocked them. (It only really helps with public posts, private posts are already protected against trolls.)

It can only be activated by your server’s administrator. It might be worth asking them if they have Authorized Fetch switched on in order to better protect their users. There’s a technical description of Authorized Fetch here ⧉ which they might find useful.

Authorized Fetch cannot be switched on from the graphical interface, it requires manually editing a certain file on the server. If a server is on a managed hosting service, the server admin can ask the managed hosting company to switch it on for them.

↩ Back to the front page

Is Mastodon end-to-end encrypted?

No. Mastodon isn’t E2EE yet.

If you’re needing to send sensitive information, use an E2EE messaging system instead.

In theory, the owner of your server could read at your DMs in the server’s database, and you’ll often hear people say “The admin can read your DMs”. This is not quite the whole story. An admin would need a certain level of technical skill, as there is no way to view DMs in Mastodon’s admin interface. The server owner would have to look directly at the database itself to read a DM, and ignore Mastodon’s interface completely.

↩ Back to the front page

Using Two Factor Authentication (2FA) on Mastodon

To keep your Mastodon account extra safe, you can activate 2FA by logging in through your server’s website, then going to ⚙️ Preferences > Account > Two Factor Auth, then follow the instructions.

Activating 2FA means that even if someone finds out your password they still cannot log into your account, as logins will also require the code from your 2FA app or physical security key. The 2FA code from an app will change each time you log in, so only someone with access to your 2FA app or key can log into your account. 2FA apps are available for all types of phones and computers.

You only need to use a 2FA app when you log in, so if you stay logged in it won’t ask for your 2FA.

Setting up 2FA is slightly tricky, and it will require you to keep a permanent copy of a special code in a safe place, preferably printed out and kept at home with your other important documents. This special code lets you access your account if you lose access to your 2FA app or key. If you’re not technically minded, you might want to get help from a trusted friend or relative in setting it up. Make sure they are people you trust, as the backup code would allow them access to your account.

Once it has been set up, 2FA is extremely easy to use: the 2FA app displays a code and you simply type this in when you log in with your normal password.

There are many, many apps that work with 2FA on Mastodon. For example Raivo and Aegis are popular. Apple’s keychain also includes built-in 2FA support. The technical name for these kinds of apps is “TOTP” or “Authenticator”, and you may see them listed under these keywords in your favourite app store.

Also, just to make clear, 2FA apps do not know what you are doing with them. They just passively display a list of security codes based on a particular timestamp and account keys. 2FA apps are essentially elaborate clocks, but instead of displaying the time they display ever-changing access codes. Your account’s server also knows what time it is, and that’s how it knows whether your 2FA access code is correct at the moment you log in.

↩ Back to the front page

How to prevent your account being suggested to others in Mastodon

On Mastodon, there’s a feature that automatically suggests accounts to follow when people first join a server, and when they click on the For You tab in Explore or Search. It is based on how many people on that server follow the account and boost its posts, and server admins can optionally add suggestions manually too.

If you don’t want your account suggested to others:

  1. log in through your server’s website
  2. Go to Edit Profile > Suggest account to others
  3. Make sure the box is unticked and click Save changes. (If you want your account suggested, tick the box and save instead.)

↩ Back to the front page

Filtering your Mastodon timeline to automatically hide posts containing certain words, phrases or hashtags

On Mastodon, you can set your timeline to automatically hide or block posts featuring certain words, phrases, or hashtags. You can choose to block them completely, or hide them behind a warning that you can open manually.

This isn’t just about offensive posts, it can be filtering for any reason at all. Some people use filters to hide Wordle posts for example. Your filters are private, and they will apply in the apps as well as on the website.

To add a filter:

  1. Log in through your server’s website
  2. Go to ⚙️ Preferences > Filters (On the mobile website you have to click ⚙️ and then ☰ and then Filters, on the computer desktop website the Filters link will be on the left side of the Preferences page.)
  3. Click the Add new filter button
  4. Choose the settings you want, then click Save new filter

Some tips which might help with creating filters:

  • The Title section at the start of a filter is just a name you want to give the filter so you remember what it does. It isn’t the actual words the filter uses.
  • You can add the filtered words and phrases in the Keywords section at the bottom. They aren’t case sensitive.
  • The filter will look for these keywords in entire posts, including the actual content, hashtags, account addresses or web addresses mentioned in posts.
  • Filters work retrospectively, so posts made before the filter was created will also be filtered.
  • You can add more words and phrases to the same filter by clicking the + Add keyword link at the bottom of the page. The filter will be triggered if any of the words or phrases are present.
  • You don’t need to include # on filtered hashtags, these will automatically be blocked if they contain a filter’s keyword.
  • You can make filters temporary by setting the Expire after section. By default this is set to “never” which means the filter is permanent.
  • The Filter contexts section lets you apply the filter to specific parts of Mastodon. If you want it applied everywhere, tick all the boxes.
  • If you have the Whole word option on the filter ticked, it means the filter only applies to posts containing exactly that word. If you UN-tick this option, the filter will also apply to posts that have that word with other letters or numbers next to it without spaces, for example within another word, or a different form of the same word.
  • You can edit or delete filters at any time by going back to the Filters section in ⚙️ Preferences.

↩ Back to the front page

How to use Content Warnings (CWs) on Mastodon and the Fediverse

Content Warnings (CWs) are optional Fediverse features which hide the content of a post behind a warning message. The post can be revealed by clicking on the warning.

Content warnings are for any kind of content where the person reading may not want to read it right that minute, but they may want to read later. It could be something serious like upsetting news, or less serious like film spoilers. There’s also a very strong Fediverse tradition that those who are able to should use CWs when talking about emotive topics such as politics or religion. It is also often used for potentially “not safe for work” content such as gore or nudity.

You can add a content warning while writing a post by clicking on “CW” or “warning” or ⚠️ or other similar icons at the bottom of the editing window. Remember to write a warning that gives people a clear idea of what to expect within the post itself, without them having to actually open it. Try to very briefly say why they might not want to open it right that minute.

What if I want to open lots of CWs at once?

On Mastodon, you can make all the CWs in a thread open or close at once by clicking the eye icon in the top right corner of the thread.

If you don’t want to see any CWs at all, you can make Mastodon open all CW posts by default by going to Preferences > Always expand posts marked with content warnings, tick the box and click Save changes.

Is it compulsory to use CWs?

No one is forced to use CWs, but it is considered polite and considerate to do so. Imagine going into a restaurant and shouting loudly at others about your political opinions, you could do it but others may not appreciate it. In extreme cases you might be asked to leave.

CWs are also an accessibility feature, as they allow people who have traumas triggered by certain topics to read potentially triggering posts when they are mentally prepared to do so. It’s important to emphasise the point that CWs are not about avoiding topics, it’s exactly the opposite: CWs make triggering posts accessible to people who would otherwise have to avoid them, in the same way that text descriptions make images accessible to blind people. They widen your post’s audience.

Having said that, it is a bad idea to call people out for not using CWs! Some people will have legitimate reasons for not using CWs, for example someone who is currently going through a serious personal trauma, or perhaps is being persecuted or under threat of violence. It is not appropriate to demand CWs from someone who is going through something really horrific in their real world life. They may have much bigger things to worry about than social media, and we should help them deal with these bigger things however we can.

Even if someone should be using CWs, having public arguments about rules is not necessarily the best way to get someone to obey them, especially if they’re new to the Fediverse.

If there’s a post you think should be CWed and there’s no obvious reason why it isn’t, check the rules on your server and then ask your server admin for advice on what to do. They set the rules, and they are ultimately the ones that decide what is allowed on there.

In short, CWs are a balancing act, and require a lot of social skill (that’s why this section is so long!). The existence of CWs brings the Fediverse a tiny bit closer to the complexities of everyday life in the real world, where reading the room is essential to getting on with people. No one is going to get this right all the time, but simply being aware of CWs as an option and using them when you feel appropriate and able will make the Fediverse a much more accessible and pleasant place to be.

How do I add a CW to a post I want to share?

You can’t add CWs to someone else’s post. The reason for this is such a feature could be mis-used to quote the post, which is deliberately not available on Mastodon.

A workaround is to do a reply to the post with a CW telling people to read the post above, and then share your reply.

↩ Back to the front page

Hiding your posts from search engines on Mastodon and the Fediverse

If you use a public visibility setting on a post, it will be visible to everyone, even people who aren’t Fediverse members. This means the post may be indexed by search engines.

You can either make your posts invisible to search engines, or ask search engines not to index your public posts.

Prevent a post being visible to search engines

The surest and safest way to prevent a post ending up on a search engine’s index is to use a non-public visibility setting. Followers-only and Mentioned settings cannot be seen by search engines, so they will not be indexed.

Ask search engines not to index your posts

Mastodon also has an option to request that search engines don’t index your public posts:

  1. Log in through your server’s website
  2. Go to Preferences > Other > Opt out of search engine indexing
  3. Tick the box and click Save changes

However, bear in mind it’s up to a search engine to decide if it wants to honour this request, and less honest search engines may decide to ignore your request. If you want a post to remain off search engines, it’s much safer to use a non-public setting.

↩ Back to the front page

How to hide your follows and followers in Mastodon

If you’re on a Mastodon server, you can keep your lists of follows and followers hidden on your profile if you want to:

  1. Log in through your server’s website
  2. Go to Edit profile > Hide your social graph
  3. Tick the box and click Save changes.

You will still be able to see your follows and follower lists when you look at your profile while logged in, but other people will not be able to see them.

↩ Back to the front page

Restricting who can follow you in Mastodon

On Mastodon, you can use a follow request system to restrict who can follow you. When it’s switched on, no one can follow you unless you manually approve their request. This can be used to screen who follows you, for example some people use it to screen out spammers.

To restrict who can follow you:

  1. Log in through your server’s website
  2. Go to Edit profile > Require follow requests, tick the box and click Save changes

After you’ve done this, a padlock icon 🔒 will appear next to your username on your profile. Anyone who clicks follow will send a friend request that you have to approve before the follow is activated.

If you change your mind about using friend requests, go back to Edit profile > Require follow requests, untick the box and click Save changes.

Blank profile pictures do NOT mean spammers

Don’t screen followers out just because they have blank profile pictures. Many blind users don’t use profile pictures, but they will have text in their profile. The best way to screen potential followers is to read what they have written about themselves and what they have posted.

↩ Back to the front page

Blocking and muting on Mastodon

It is totally fine to block or mute people on Mastodon and the Fediverse. It is not considered rude or unusual to do so. Use it as freely as you want!

To block or mute someone on Mastodon:

  1. Either click ⋯ on one of their posts, or go to their profile and click the ⋯ or︙ button at the top
  2. Select Mute, Block or Block domain, depending on what you want
  3. If you change your mind, do the same thing again but select Unmute or Unblock

Here’s what these options mean:

  • Mutes are the softest option. When you mute someone you will no longer see their posts and you won’t see posts that mention them. You can also optionally mute notifications from them. People who are muted will not know they are muted, and they will still be able to follow you, see your posts and interact.
  • Blocks are the harder option. When you block someone, it does everything a mute does but also prevents them following you and hides your posts from them while they are logged in.
  • Domain blocks are the most extreme option, and they will block not only that account but all accounts using the same server, and remove any follows from that server. You probably don’t need to do this. The only times this is advisable is if a server is full of nasty people and the server administrator is refusing to do anything about it, or if the server is actually owned by the person you want to block.

⚠️ Important: If you are posting public posts they will still be visible to the blocked person when they log out, because public posts are visible to everyone on the internet. To restrict the audience for a post, use followers-only or mentions visibilities.

How do I keep track of who I’ve muted and blocked?

To view lists of all of your blocks and mutes:

  1. Log in through your server’s website
  2. Go to your profile page and click ︙
  3. Select Muted Users, Blocked Users or Blocked Domains
  4. If you want to remove a mute or block, click the icon next to a name on the list

How do I do a temporary mute?

To have a temporary mute on Mastodon, log in through your server’s website and it will offer you the option of setting a duration when you’re confirming the mute. Set the duration to however long you want the mute to last.

How do I mute just someone’s boosts?

On Mastodon, if you follow someone and you want to see their posts but not their boosts, you can hide just their boosts without blocking or muting them. This doesn’t affect their normal posts, and they have no way of knowing you’re doing it.

  1. Open your Mastodon app or log in through your server’s website
  2. Go to the profile of the person whose boosts you want to hide
  3. Click on the ︙or ⋯ button at the top and select Hide boosts from… (or Hide reblogs on some apps)
  4. If you change your mind, go back to their profile and select Show boosts from… (or Show reblogs)

This only works on accounts you follow.

What happens to DMs sent by someone I’ve muted or blocked?

If you mute or block someone, you won’t see any DMs from them by default. However if you decide to browse their profile you will see any DMs sent to you in their profile timeline.

If you remove a mute or block, DMs will start arriving as normal, but any DMs sent during the mute or block will only be visible by going to their profile.

How do I block DMs from people I don’t follow?

  1. Log onto your server’s website
  2. Click ⚙️ Preferences
  3. Click Notifications (on the mobile website click ☰ and then Notifications)
  4. Tick the box marked “Block direct messages from people you don’t follow”
  5. Click the Save Changes button

If you change your mind, repeat these steps but untick the same box.

Also, if you are blocking DMs from strangers, you might want to mention this on your profile description to avoid any misunderstandings. (This avoids situations where people are trying to contact you for legitimate reasons but think you’re ignoring them.)

Another thing to bear in mind is it will also block private replies in threads from people you don’t follow, as these are technically the same as DMs on Mastodon.

↩ Back to the front page

How do I contact the people who run my server? How do I find out what my server’s rules are?

If you have any problems with the server which can’t be addressed through the reporting system, you can email the administrator (or “admin”) of your server directly.

On Mastodon, you can find the public email address of your server admin on the server’s About page. The same page also lists the server’s rules. To find it, go to your server’s website and click on “Learn More”. You don’t need to be logged in. The email address will be listed in the top half of the About page, just above the list of rules. It is worth reading the rule list as it varies from server to server, and it is usually written in plain language that is easy to understand.

↩ Back to the front page

Reporting problematic content to moderators on the Fediverse

Reporting anti-social accounts is a good idea as it’s the main way server administrators find out about nasty behavour. Once admins are made aware of a problem, they can take action using special blocking tools that are not available to ordinary users.

How do I report posts or accounts on Mastodon?

  • To report a post click ⋯ on the bottom of the post and select Report.
  • To report an account, go to its profile and click ︙ or ⋯, then select Report.

Remember to include examples!

Whatever you’re reporting, it’s really important to include examples of what the account has done wrong. Simply reporting the account with no examples creates a lot of work for the moderators, and it may make it impossible for them to moderate effectively.

On Mastodon, the reporting wizard includes options to select posts from that account, and if you’re reporting via a post then that post will be automatically selected as an example to include on the report.

If possible, tell the account’s own server too

Mastodon reporting forms include the option to also send an anonymous report to the server of the account that wrote the post. This is usually a good idea, because only a user’s home server has the power to suspend or delete their account. Other servers can block accounts, but in the worst cases it may be better that a nasty account is deleted at source.

However, there is a caveat to this: if the problematic user’s entire server is also problematic, it may be best not to include them in the report. Such servers tend to lash out when people report their behaviour. Your own server admin will be able to block problematic servers completely, which is usually the best way of dealing with such servers.

What do I do about accounts that just boost nasty stuff?

If there’s an account that boosts lots of problematic posts, go to their profile and report them from there (by clicking ︙ or ⋯). If you do this though, remember to mention in the comments section of the report the boosts that are problematic and why, so that the moderator can locate them more easily.

What exactly ARE the rules on the Fediverse?

Each server is totally independent and sets its own rules for acceptable behaviour. If you go to a server’s about page you should see a copy of its rules. If possible, it’s worth reading this before you sign up on a server, as it can tell you a lot about their approach to moderation.

If there’s something bad happening and it isn’t covered by the rules, report it. There will often be bad situations that could not have been anticipated by the admin when writing the rules, and they depend on user reports to find out about them.

If you’re in any doubt about what is acceptable, ask your server’s admin for advice. If there’s something wrong with their approach or attitude, you might want to consider transferring your account to another server.

↩ Back to the front page

Do I need to use my real name or real photo?

No.

You don’t need to reveal any kind of personal information about yourself on the Fediverse. Use any name you want, and any picture (or no picture at all).

The only information you need to give when signing up on a Fediverse server is an email address, and you can use an email alias if you want to keep it secret. The only other data a Fedi server might see is your computer’s or phone’s IP address, but this is hidden if you’re using a VPN or Tor.

Revealing personal information on the internet is a bad idea in general, as it makes unwanted tracking and identity theft much more likely.

↩ Back to the front page

How to delete your Mastodon account

You can delete your Mastodon account at any time. There’s no cool-off period, the deletion happens as soon as you confirm it.

  1. Log in through your server’s website
  2. Go to Preferences > Account > Delete account
  3. Click Proceed here and follow the instructions. It will ask you for your password to confirm the deletion.

⚠️ After you confirm deletion, it will delete your account straight away and it cannot be restored. Be really sure you want to do this. Once it’s deleted, it is gone forever and no one can bring it back.

After an account is deleted, no one else will be able to use that username on that server, in order to prevent anyone impersonating a deleted user. If you want to sign up for a new account on the same server, you’ll need to think of a new username.

↩ Back to the front page

How to log out of your Mastodon account

On Mastodon, if you’re logged in on your server’s website, you can log out by clicking the ︙ (in desktop mode) or the ☰ (in mobile mode) and selecting Logout at the bottom of the menu.

If you’re logged in on the official apps, you can log out by clicking the ⚙️ settings icon and selecting Sign out at the bottom of the menu.

The third party apps will have various ways of logging out, usually on their settings pages.

IMPORTANT NOTE: You don’t have to log out to use a different account on a different server, you can be logged in on multiple accounts at once. The websites, the official apps and the third party apps all support being logged in on several different accounts at once, as long as the accounts are on separate servers. To log in on another account on the website just go to the other server’s site and log in. To log in on another account on the apps, click and hold your profile picture in the bottom right corner of the screen.

↩ Back to the front page

How do I browse the Local timelines of other servers on Mastodon? Can I follow other servers’ Local timelines from my account?

On Mastodon, you can browse other servers’ Local feeds by going to the server’s website and clicking the “Local” link. You don’t need to log in, anyone can look at the feed because Local feeds only show public posts anyway.

What about following another server’s Local timeline?

Some third party Mastodon apps (Fedilab and Subway Tooter on Android, Ice Cubes on iPhone/iPad) let you follow the Local timelines of other servers. The website interface and the official apps do not have this feature yet.

Many, many people have asked for this feature to be added to the website interface. If you want to vote for this and you are comfortable using Github, click here and give a thumbs up to the first post in this thread ⧉. This will let the developers know that the feature is wanted.

↩ Back to the front page

What are the Local, Federated and Home timelines? How do I stop them scrolling too quickly?

Most Fediverse server types including Mastodon have options to show three different timelines: Home, Local or Federated. They might have slightly different names depending on the server type, but they’re usually something like this.

  • Home is the normal timeline that you see by default. It shows you all the posts from all the people you follow in chronological order. This is what you see when you log in to your account.
  • Local (also known as Community on some apps) shows all the public posts made by all the people on your server. On larger servers this can be a so-called firehose that is too random and unfiltered. However, on smaller servers this can be a really interesting feed to read, especially if the server is well moderated. Many people on small servers discover new accounts to follow through the Local feed.
  • Federated shows all public posts that your server has noticed. Click here for a guide to which posts and accounts your server will notice. On larger servers Federated is an absolute nightmare to comprehend as there are so many posts on so many different topics.

To view the Local feed on the official Mastodon app by clicking the magnifying glass and then scrolling to the “Community” tab. Community is just another name for Local, they are exactly the same thing.

The official Mastodon app doesn’t show the Federated feed at all, but you can see it by switching to a third party Mastodon app, or by logging in through your server’s website.

The timelines are scrolling way too quickly, I can’t keep up with them! Help!

If you’re logged in through your Mastodon server’s website, you can optionally use “slow mode” to stop all automatic scrolling on feeds. When slow mode is activated, the feed will only show new posts when you manually click a special link at the top of the feed. To switch it on:

  1. Log in through your server’s website
  2. Go to ⚙️ Preferences
  3. Tick the box marked Slow Mode, then click the button marked Save Changes

To deactivate slow mode, do exactly the same thing but UN-tick the Slow Mode box and click Save Changes.

How do I see another server’s Local timeline?

Click here for more info on how to do this.

↩ Back to the front page

What are toots? What are boosts? What are CWs? What are instances? What is birdsite?

Mastodon and the Fediverse have a number of common terms which you may not have heard of on other social networks. Here’s a guide:

  • Toots are posts, the Mastodon equivalent of tweets. The mascot for Mastodon is a mastodon, an ancient relative of the elephant ⧉, and “toot” is sort of the sound an elephant makes. Programmers sometimes call them statuses.
  • Boosts are shared posts, the Mastodon equivalent of a re-tweet. Programmers sometimes call them re-blogs. If you boost a post, it will appear in the home timelines of your followers.
  • CWs are Content Warnings, used to hide a post underneath a title. There’s detailed info about them here including why they exist and how to use them.
  • Instances are the sites you can sign up on on the Fediverse, also known as “servers”. They were also known as “communities” for a while, and some people call them “nodes”. All of these are just different names for exactly the same thing: the site you signed up on. If someone talks about Fediverse instances, they are talking about Fediverse servers, they are one and the same.
  • “Birdsite” and “Hellsite” are nicknames for Twitter, sometimes indicated by a bird on fire (it’s a comment on how discussions on Twitter very often turn into horrible arguments).

↩ Back to the front page

Inviting people onto Mastodon and the Fediverse

The easiest way to invite friends, family or colleagues to join you on the Fediverse is to send them a link to JoinMastodon.org ⧉ or Fedi.Garden ⧉ or another Fediverse “on-boarding” website. Once they’ve signed up on a server, they can use their account to sign in on their server’s website or on a comptible app.

Once your friends are on the Fediverse, you can exchange addresses with them and follow each other. You don’t need to be on the same server as them, following and interacting with each other is the same experience even if you’re on different servers.

How do I invite people to join my server? Can I invite people if sign-ups are closed?

If you do want people to sign up on the same server as you, there’s an “invite” feature on Mastodon which lets you invite them directly to your server:

  1. Log in on your server’s website
  2. Go to Preferences > Invite people
  3. Choose the settings you want for your invitation links and then click Generate.

Some servers close themselves to new sign-ups if they get too full, but still allow existing members to generate invitations. If your friend is unable to sign up on your server directly due to it closing to new members, they may still be able to sign up if you send them an invitation.

↩ Back to the front page

Customising your Mastodon interface colours

If you’re using Mastodon through the website, you can choose your interface colours by going to Preferences > Site theme, choose the theme you want and click Save changes. By default Mastodon servers come with a dark theme, light theme and high contrast theme, but some servers have a lot more options. If you want more themes, ask your server administrator about it.

If you’re using Mastodon through the official app, you can choose interface colours by clicking the cog gear icon ⚙️ and select Automatic, Always Dark or Always Light, then click Done. There’s also a toggle switch to activate “True Black”, which gives the dark mode a much darker background colour than usual.

↩ Back to the front page

Favourites vs. Bookmarks in Mastodon

Mastodon has two ways to mark posts: Favourites and Bookmarks. These are similar, but they differ in important ways. Here’s a quick comparison:

  • Favourites can be added by clicking on the star icon below a post. Favourites are pretty much the Mastodon equivalent of likes, and usually used to indicate you enjoy or appreciate a post. When you add a favourite, the person who posted it will get a notification and your profile may be visible on the list of people who favourited it.
  • Bookmarks can be added either by clicking on the bookmark icon below a post, or if it isn’t visible click on the ⋯ to open the menu and select Bookmark. Bookmarks are totally private, no one else sees what you bookmark. No one gets any notifications when you add a bookmark.

On the official apps, you can see your past favourites and bookmarks on apps by clicking on your profile picture to go to your profile page, then click on the “Favourites” (Star) or “Bookmarks” (Bookmark) icons.

On your server’s website, you can see your past favourites and bookmarks by clicking on the “Favourites” or “Bookmarks” icons at the right side of the screen.

↩ Back to the front page

Why can’t I quote other posts in Mastodon?

If you’re used to Twitter, you may be wondering why there’s no equivalent of the “quote tweet” on Mastodon.

This was a deliberate design decision taken many years ago by the makers of Mastodon. Here are the lead developer’s comments on it:


Another feature that has been requested almost since the start, and which I keep rejecting is quoting messages. Coming back to my disclaimer, of course it’s impossible to prevent people from sharing screenshots or linking to public resources, but quoting messages is immediately actionable. It makes it a lot easier for people to immediately engage with the quoted content… and it usually doesn’t lead to anything good. When people use quotes to reply to other people, conversations become performative power plays. “Heed, my followers, how I dunk on this fool!” When you use the reply function, your message is broadcast only to people who happen to follow you both. It means one person’s follower count doesn’t play a massive role in the conversation. A quote, on the other hand, very often invites the followers to join in on the conversation, and whoever has got more of them ends up having the upper hand and massively stressing out the other person.

Cage the Mastodon: An overview of features for dealing with abuse and harassment ⧉

However, comments in 2023 by the same lead developer imply that they are considering introducing some kind of quote post feature, possibly with an opt-in system to prevent quoting without consent.

↩ Back to the front page

How do I pin posts on my Mastodon profile?

Pinned posts are posts that appear at the top of your profile page, above your normal posts. Many people use them as introductions, but they can be used for any purpose, for example artists often use them as mini-portfolios with images, video or audio attached.

To pin a post on Mastodon:

  1. Log in through your server’s website or a third party app (the official app doesn’t support pinning yet)
  2. Go to one of your own posts that you want to pin, click the ⋯ icon on the post and select Pin to profile.
  3. The post will now be pinned to your profile. To unpin it, click ⋯ on the post and select Unpin.

You can pin up to five posts at once on your Mastodon profile. To change the order of pinned posts, unpin a post and repin it to place it higher up the list.

Pinned posts will be the first thing people see when they look at your profile, and for various technical reasons pinned posts will be more widely seen on the Fediverse than normal posts.

(For technical people interested in this topic, Mastodon servers which encounter your account for the first time will automatically “backfill” all pinned posts on your profile.)

↩ Back to the front page

How do I edit posts in Mastodon?

Screenshot of Mastodon web interface with edit button highlighted
Screenshot of Mastodon web interface with Edit button highlighted

Mastodon lets you edit your posts after they have been published:

  1. Go to one of your posts that you want to edit
  2. Click the ⋯ icon on the post
  3. Select “Edit”

This works on your server’s website, the official apps and third party apps. Third party apps may have a slightly different interface depending on which app you use.

When a post is edited, people who have interacted with it will receive a notification in case they want to change their interaction. There will also be a note on the post showing it has been edited along with links to previous versions so that others can see how it has changed. These measures together reduce the chance of anyone abusing the editing feature.

(There was a bug in the first version of editing which meant you couldn’t edit image descriptions. However, version 4.1.0 of the Mastodon server software fixed this.)

↩ Back to the front page

How do I share posts on Mastodon and the Fediverse?

You can share a post within the Fediverse by selecting the Boost button which is usually spinning arrows, something like this 🔃

You can share posts with people outside the Fediverse by selecting the Share option, which is often shown as an arrow leaving a square.

On Mastodon’s website version, you can also get a direct link to the post by clicking the ⋯ below a post and selecting Copy link to this post. Alternatively, you can get embedding code to put the post on your own blog or website by clicking ⋯ and selecting Embed.

↩ Back to the front page

What are custom emoji? How do I access them? Can I add new ones?

Every Mastodon server (and some other Fedi server types) can add their own custom emoji, which can be used alongside standard emoji. People on other servers can see your server’s custom emoji, but cannot type them. The emoji can be stills, or short animations within certain size limits.

Here’s how to use them:

  • If you’re logged in through your server’s website, you can access the custom emoji through by clicking the emoji picker icon 😂 in the top right of the post writing window. The picker normally has custom emoji at the top and the standard ones below them.
  • if you’re using apps, the custom and standard emoji are normally in two separate menus. For standard emoji use the emoji button on your phone’s own on-screen keyboard, for custom emoji use the app’s own emoji icon when writing a post.

Server administrators can add any emoji they want. If you have ideas for custom emoji, contact your server’s admin and tell them about it. When admins add an emoji, everyone on their server is able to use it.

Admins can also block offensive custom emoji from other servers, so if you see any offensive emojis let your admin know by reporting that particular post.

↩ Back to the front page

How do I post images, videos or audio in Mastodon? What can I attach to a post? How do I post GIFs?

On Mastodon, you can attach up to four images, or one video file, or one audio file when making a post. Click on the paperclip 📎 or landscape 🌄 icon to attach something to your post.

  • Images can be PNG, JPG or GIF (including animations). The maximum file size is usually 8mb per image.
  • Video clips can be MP4, M4V, MOV or WebM files. The maximum file size is usually 40mb, but there is no limit on running time.
  • Audio clips can be MP3, OGG, WAV, FLAC, OPUS, AAC, M4A or 3GP files. The maximum file size is usually 40mb, but there is no limit on running time. (If you’re uploading OPUS files, you need to rename them to have a .ogg extension instead of .opus, due to a known bug ⧉.)

File size limits may vary on different servers, but these are the defaults. Ask your server admin if you have problems with uploads. Note that if your server is unusually busy (for example if there are unprecedented numbers of new users signing up all at once) then file uploads may slow down or stop for a while.

Remember to add text descriptions to attached files before posting, so that they can be accessible to people with disabilities. You can do this by clicking Edit on the file before posting, or writing on top of the file itself on the official apps. For video clips, remember to describe both the audio and video, so that both deaf and blind people are able to find out what’s going on.

There is no GIF picker on Mastodon due to the federated nature of the Fediverse. However, if you post a link to GIF it will automatically be embedded when you post it, as if the GIF had been chosen from a picker. Alternatively, if you have the actual GIF file stored on your computer or phone, you can upload it as an image.

↩ Back to the front page

Who can see my posts in Mastodon? How do I send DMs in Mastodon?

On Mastodon there are four types of post visibility. You can set the visibility of a post by clicking the icon that represents it in the row below the message editing window. It’s usually a 🌐, 🔒, 👥 or @ icon. You can set the default visibility by logging in through the website and going to Preferences > Other > Posting privacy, then set what you want as default in the menu and click Save changes.

Some more details about each setting:

  • Public – Anyone can see it, even people who aren’t on the Fediverse. If you go to a person’s public profile page you will see all their public posts. This is normally indicated by a globe icon 🌐.
  • Unlisted – Anyone can see it, but it won’t appear in the Explore section or the Local or Federated timelines, and won’t be searchable by hashtags. This can be useful for replying in threads, so that you’re not filling people’s timelines unnecessarily. Normally indicated by an open lock icon.
  • Followers-only – Only your followers can see these, normally indicated by a lock 🔒 or people 👥 icon. If you use this setting, it’s a good idea to switch on follower requests, otherwise anyone could follow you to see your followers-only posts. You can do this by logging in on your server’s website, going to Edit profile > Require follow requests, tick the box and click Save changes.
  • Mentioned – Only people you @ within the message can see this kind of post, it’s normally indicated by an @ symbol. This is the Mastodon equivalent of DMs. IMPORTANT: Only mention people if you want them to see the message. If you want to talk about an account without them seeing the message, don’t @ them.

Sending DMs in Mastodon

You can send DMs by setting a post’s visibility to Mentioned, then @ the people you want to receive the DM. If you log in through the website, there’s a Direct messages option in the menu which lets you see all your mentioned posts in an inbox.

If you @ someone in a DM, they will be able to see it

⚠️ In all modes including DMs, if you @ someone in a post, they will see that post! Be really careful who you @ in a post because it’s the same thing as sending them a message.

I can’t see Unlisted as an option on my app?

Unlisted is available as a visibility option on almost all versions of Mastodon including the websites and the third party apps, but not on the official apps. For some weird reason the developers of the official Mastodon apps decided to leave it out. If you’re comfortable using Github, you can let the developers know you want it added on the iOS version ⧉ and the Android version ⧉.

Setting your default post visibility

You can set which visibility is your default by logging in on your server’s website and going to Preferences > Other > Posting Privacy, choose the default you want and click Save changes. This is only a default, you can still override it for individual posts by clicking the visibility icon.

Is it possible to edit post visibility?

You cannot edit the visibility of a post after you’ve published it, so make sure you choose the correct visibility before posting! If you absolutely have to change the visibility, your only option is to delete the post and start again, which is most easily done by clicking ⋯ below the post and then Delete & re-draft. If you use this option, the original post will cease to exist, its boosts and bookmarks will disappear, links to it will break and its replies will be orphaned.

Who can see my boosts?

When you boost a post, it will immediately appear in the home timelines of all your followers. The original author of the post will also get a notification to say that you boosted their post.

When do replies appear in the Home timeline?

Replies will appear in your Home timeline if any one of these are true:

  • The reply mentions you
  • You wrote the reply
  • The reply is by someone you follow AND mentions someone else you follow
  • Someone you follow is replying to themselves to create a thread

When do Unlisted posts appear in the Home timeline?

Unlisted has a slightly complicated behaviour pattern in the Home timeline, and this isn’t officially documented for some reason. Here’s how it works:

Unlisted posts and replies from people you follow WILL appear in your Home timeline, unless they are a reply to someone you don’t follow. If they’re a reply to someone you don’t follow, they WILL NOT appear in your Home timeline.

Or if you want a complete list:

  • Unlisted posts (not replies) from people you follow WILL appear in your Home timeline
  • Unlisted posts and replies boosted by people you follow WILL appear in your Home timeline
  • Unlisted replies between two people you follow WILL appear in your Home timeline. This also includes a person you follow replying to themselves, for example if they are posting a thread.
  • Unlisted replies between a person you follow and another person you don’t follow WILL NOT appear in your Home timeline

↩ Back to the front page

Is there a built-in language translation system on Mastodon?

Yes, it is now available to all Mastodon servers. If your server is running the service, you will see a “Translate” link underneath a post in a different language. If you don’t see these links, ask your server admin about it.

The feature relies on knowing which language you speak, so make sure your account’s language preferences are set correctly, as this will allow the system to automatically suggest translations for you. If you have the incorrect language set on a post, it may confuse the translation system.

This feature is currently only on the website interface and also on the excellent third party app Fedilab ⧉.

The built-in translation uses open source translation provider LibreTranslate ⧉.

↩ Back to the front page

Setting your language preferences on Mastodon and filtering out posts in other languages

There are lots of language options on Mastodon to help you understand other people, and help other people understand you. At the time of writing there are 95 different languages and dialects to choose from.

Interface language

The interface language is the language used on menus, buttons, labels, forms etc when you are logged in. To choose your Mastodon interface language:

  1. Log in through your server’s website
  2. Go to Preferences > Interface language, pick the language you want and click Save changes

Filtering timelines by language

You can filter Mastodon timelines by language:

  1. Log in through your server’s website
  2. Go to Preferences > Other > Filter languages
  3. Tick the boxes for languages you want to see and click Save changes
  4. To switch the language filter off (so that you see all languages), make sure all the boxes are UN-ticked and click Save changes

When the language filter is on, posts in other languages will no longer appear in your timelines. However, if you follow someone this will override the language filter and show you all their posts regardless of language used.

Posting language

It’s important to set your posting language, because it means people using language filters to show your language will see your posts. Setting this also allows other people to automatically translate your posts using Mastodon’s built-in translation system.

To set which language you post in:

  1. Log in through your server’s website
  2. Go to Preferences > Other > Posting language
  3. Choose which language you use most often and click Save changes

If you post in multiple languages, you can change which language you’re using each time you’re writing a post:

  1. Write the post but don’t publish it yet
  2. Select the language you are writing from the language button. The language button is a two letter country code in the bottom row of icons, for example EN for English.

By default the button will be your selected posting language, unless you are replying to a post marked in another language in which case it will be set to that language.

The language button should remember your most recently chosen languages at the top of the menu.

Contributing translations

If you want to add or correct translations on Mastodon, click here to go to the Mastodon translation website ⧉.

↩ Back to the front page

Where are the trending posts and hashtags on Mastodon?

Mastodon has a section called Explore which shows trending posts and hashtags.

  • On your server’s website, just click on the # Explore link on the right to see trending posts, tags and links. You don’t need to be logged in, and you can even browse Explore on other servers’ websites if you like. The trending posts and tags on different servers will be slightly different as they have different views of the Fediverse. You do need to be logged in if you want to interact with the posts, however.
  • On the official Mastodon apps click on the magnifying glass at the bottom of the screen and it will show you trending posts, tags and news by default (there’s also a Community tab which shows the latest public posts on your server). Don’t type or click anything in the search box, otherwise it will try to find items related to a search instead.
  • Third party apps display trends in various different ways using their own interfaces. However, they usually use the word “Trending” in some way to indicate the Explore section.

↩ Back to the front page

How to be notified when someone posts on Mastodon

On all Fediverse servers, when you follow someone you’ll see all their posts in your home timeline in chronological order. No posts will be hidden, but when you follow a lot of people it can be easy to miss some of the posts in a complete timeline.

In Mastodon, if there are particular accounts where you really need to see their posts, and you don’t have time to go through your timeline every day, you can set these accounts to also notify you when they post. They will still be in your timeline as normal, but you’ll also see an alert in your Notifications section.

Here’s how to do it:

  1. Log in through your server’s website
  2. Go to the profile of the person you want to be notified about
  3. Click the bell icon 🔔 next to their follow/unfollow button.

Note that this only works for people you follow. If you want to stop notifications, click the same bell icon again.

Can I do this through apps too?

Yes, but they may sometimes have a slightly different interface. For example the Toot! app has a “Notify” button on profile pages instead of a bell.

↩ Back to the front page

How do I get my account discovered on Mastodon and the Fediverse?

If you want your account to be discovered by more people with similar interests, here are some tips:

  • Write something about yourself on your profile. It doesn’t have to be personal info, but it should let people know you’re a human being and give them some idea of what you’re interested in.
  • If you want your posts to be completely searchable, even without hashtags, you can opt into being part of the full text search system
  • If you have a website, include a link to it on your profile. Remember to have https:// at the beginning so that people can click on it. If you’re an official account, you might want to verify the website link too.
  • Make sure the first line of your profile text sums you up well, as Fediverse discovery systems often only show the first line.
  • If you want to, add a profile picture and header image, but these are both optional. Blind people often don’t use images on their profiles, so it is totally normal for a profile to have no images on it.
  • Write a public post saying something about yourself, and include the hashtags #Introduction, #Introductions and #NewHere. Try also searching for these hashtags and replying to other people’s introductions.
  • Pin your introduction post on your profile by clicking the post’s ⋯ icon and selecting Pin on profile. For various technical reasons to do with “backfilling”, pinned posts are much more visible than ordinary posts.
  • Remember to use hashtags in posts that you want to be discovered, as lots of people follow hashtags and they are a very popular discovery method on the Fediverse.
  • Include text descriptions on your images, video or audio. A lot more people will share those posts, as accessibility is valued on the Fediverse.
  • Join in with conversations, follow other people, and eventually you’ll get some follows back. See here for tips on how to find people to follow.
  • After you’ve been on here a while, add yourself to the directory at Trunk ⧉ and the directory at Fediverse.info ⧉. There are instructions on these sites telling you how to add yoursrelf.
  • On Mastodon, log in through your server’s website, go to Edit profile > Suggest account to others, tick the box and click Save changes. This will add you to automated follow suggestions that others may see.

When to post your best content

Don’t post your best content when you have literally zero followers. Fediverse servers “notice” posts from accounts that their members follow. If you post stuff when you have 0 followers then your post won’t be visible to anyone except users on your own server. Even having a handful of followers will make your posts a lot more visible, because all of your followers’ servers will notice what you post.

↩ Back to the front page

What kind of accounts can I follow from Mastodon?

If you’re on Mastodon, you can follow other Mastodon accounts of course, but you can also follow accounts from many other types of Fediverse server such as PixelFed, PeerTube, Friendica, BookWyrm, OwnCast and many others.

Also, the following process is so seamless that you probably won’t even notice you are following accounts outside Mastodon! They will look just like any other account on your timeline, and you will appear the same way to them. Fediverse servers always display content in their own style, regardless of the style used on the server the content came from.

If you’re using Masto through the website, you can see what an account really looks like by going to the account’s profile page, clicking ︙ and then “Show original page”. This will open the account’s public profile page on its home server.

Following a non-Mastodon Fediverse account is easy, it’s exactly the same process as following a Mastodon account: if you can already see their profile just click Follow, or if you have their account address paste it into the search box and it will display their profile.

↩ Back to the front page

Why does it say “Pending” when I try to follow someone on Mastodon?

Usually it means the account has follow requests switched on, so they have to manually approve all follows. You can tell if an account has this switched on because it will have a padlock next to their name on their profile page.

Alternatively, it may be that your server is just really, really busy and has put your follow in a queue to deal with it later. If this is the case, just leave it pending and the follow will happen eventually.

A third possibility is there’s a bug somewhere, as a broken follow sometimes triggers the “Pending” message even when there’s no follow request or busy server.

Don’t assume someone is rejecting your follow just because it says “pending”. Leave it pending for a while to give it time to work through any possible queues. If it still says pending after a few days, contact the person directly and ask them if they are aware this is happening.

↩ Back to the front page

How do I discover accounts to follow on Mastodon and the Fediverse?

There are lots of ways to discover interesting accounts on topics you are interested in, see below for a complete list.

(If you want to follow people you already know in real life, the most reliable way to do that is to exchange account addresses with them. Click here to go to the account address guide.)

Follow hashtags

Maybe the easiest way to to discover new accounts on particular topics is to follow hashtags. Posts with followed tags will appear in your home timeline automatically as soon as they’re posted, so you don’t have to go looking for them. Click here for more details on how to follow hashtags.

Join Groups

Groups are special kinds of accounts which share posts on particular topics. If you want to post to the group, you just mention the group’s account and your post gets shared with all the group’s followers. Click here for more details about groups and how they work.

Follow people to discover even more people

When you follow an account, that account will often share interesting posts from others, and pretty soon you’ll be following some of the authors of those shared posts too. There is no algorithm on Mastodon and the Fediverse, it’s all human beings, and word of mouth is a significant way to discover interesting accounts.

Discover people from Twitter on Mastodon and the Fediverse

There’s a special website called FediFinder which lets you discover the Mastodon / Fediverse accounts of people you currently follow on Twitter.

Browse directories

Another method is to browse human-run Fediverse directories. They only list a fraction of the users on the Fedi, but they’re a really good way of beginning the process of building up your timeline. The people you follow will then share posts from others, and soon you’ll be discovering even more accounts to follow just by browsing your own timeline.

Here are some good Fediverse directories:

Follow curators

There are human-run accounts dedicated to sharing interesting posts on specific topics or areas. Following them can offer you lots of suggestions for interesting accounts to follow.

Look at trending posts and hashtags

Mastodon has a built-in feature for seeing which posts and hashtags are trending, this can help you discover interesting accounts and active topics:

  • To access trends on your server’s website, click the # Explore link on the right of the screen. You can also browse Explore on other servers’ websites if you want to, as it doesn’t require logging in.
  • To access trends on the official apps click the magnifying glass and leave the search box blank. There’s no Explore label on the official apps, but it’s the same contents as Explore. This will show you trending posts and hashtags which will help you discover even more interesting people. There’s also an extra tab labelled “Community” which is the same thing as the Local timeline on the web interface.
  • You can also see trending posts and hashtags on third party apps, they will have their own interfaces for seeing them, usually labelled “Trending” or similar.

Trending posts are based on how often they have been recently shared, trending hashtags are based on how often they have been recently used.

Use StreetPass for Mastodon

There’s a free open source web browser extension called StreetPass for Mastodon ⧉ which checks if websites you’re browsing have featured their Mastodon address using a verified link. The extension gradually builds up a list of Mastodon accounts you might want to follow, based on which sites you’ve browsed.

Hang out on the timelines

Finally, the most traditional approach to discovery is simply to hang out on the timeline, search for particular hashtags, browse the Local or Federated timelines and follow any accounts you find interesting.

↩ Back to the front page

How do I do likes and re-tweets in Mastodon? And what are bookmarks?

  • The Mastodon equivalent of “Likes” are “Favourites”, click the star ⭐ to favourite a post. Favouriting tells the author that you liked their post, but does not affect the post’s visibility at all.
  • The Mastodon equivalent of a “Re-Tweet” is a “Boost” (and some apps call it a “Re-Blog”). To boost a post, click the circular arrows 🔃 underneath it. Boosted posts will appear in the timeline of everyone who follows you, and boosting will also help a post appear on the trending posts chart in the Explore tab. Boosts are the only way to make a post more visible.
  • There’s also a third option called “Bookmarks” which lets you keep a private list of posts you want to read later. Only you can see your bookmarks, the people you bookmark do not know about it. To bookmark a post click ⋯ underneath the post and then “Bookmark” (some interfaces will also show a bookmark logo which you can click instead).

You can browse past Favourites and Bookmarks on your profile page on the official apps, on the icons on the right of the screen on the web, or with other interfaces on third party apps.

You can see all your past Boosts by browsing your profile page, they will be mixed in with your own posts in chronological order.

↩ Back to the front page

How do I search for stuff on Mastodon? How do I use hashtags?

You can search for posts on Mastodon by typing words or hashtags into the search box.

  • To search on the official app, tap the magnifying glass icon at the bottom of the screen, and type in the search box at the top of the screen. The results will appear below it.
  • To search on your server’s website, type into the search box and press enter. The results will appear beside or below the search box, depending on your window size.
  • If you’re using the website through a phone, click on the 🔍 magnifying glass icon at the top.

If you’re searching for hashtags, they have to have a # at the beginning, and they can’t have any spaces or special characters in the middle.

If you want your post to be more easily found in searches, opt into full text searches and include lots of relevant hashtags. Remember to use CamelCase on hashtags that contain multiple words.

What order are search results shown in?

Chronological, with newest posts at the top.

I thought Mastodon only allowed searches with hashtags?

Until very recently, Mastodon searches were entirely based around hashtags. However, since version 4.2.0 (released in September 2023) Mastodon also allows full text searches where you just type what you want and it searches the entire texts of posts for matches.

HOWEVER… for privacy reasons the full text search is opt-in, so you can only get search results for people who have opted into their posts being included in full text searches.

How do I opt in to being searched by words as well as hashtags?

See the following link on how to opt in to being in full text search results.

Even when I search for stuff, there’s never anything I want!

If you’re on a very new server, it’s possible that it hasn’t noticed much of the Fediverse yet. Try asking your server’s admin if they might connect to a relay server, so that their server can see more of the Fediverse.

Are there any special operators for filtering searches on Mastodon?

Yes, Mastodon 4.2.0 introduces a number of operators you can use to filter with. You can use several of these within the same search:

  • has:media, has:poll, has:embed – Filters for posts with an attachment (images, audio, video), a poll, or a link that produces some kind of embedded media (such as a YouTube link).
  • language:fr using language codes – Filters for posts using that language, the example would filter for posts in French. Click here to see a complete list of language codes on Mastodon.
  • is:reply, is:sensitive – Filters for replies or posts marked as sensitive.
  • from:user, from:me – Filters for posts by particular user, the “me” tag searches only posts you have made yourself.
  • in:all, in:library – All filters for any post, library filters for posts you have interacted with or written yourself.
  • before:date, during:date, after:date – Filters for posts before, during or after the selected date. Dates are written in the format YYYY-MM-DD, so for example posts after 1st June 2023 would be after:2023-06-01

Make sure there’s no space between the : and the other words when using these operators.

↩ Back to the front page

How do I customise my profile page? How do I verify my account?

All Fediverse platforms let you set a profile name, picture, banner image and short text or biog about yourself. You should see an edit button on your profile page which lets you change all these things.

Filling in your Mastodon profile metadata

On Mastodon, there’s also a special feature called Profile metadata which creates a special section of your profile page with clearly labelled website links or any other info you want to highlight about yourself.

To edit your profile’s Metadata feature:

  1. Log in through your server’s website
  2. Go to Edit profile > Profile metadata
  3. Fill in up to four labels and content. The labels can be text or emoji, the content can be links, text or emoji. If you do put links in, remember to put the https:// at the start so that they are clickable.
  4. Click Save changes

For example, you could have a label saying “My website” and “https://example.com” as the content next to this label. Or you could have a label “Favourite pizza” and a pineapple emoji as the content. It’s totally up to you how you use this feature.

If you add a website link in your metadata, you can optionally verify it to prove you are the owner of the site.

Profile metadata appears as prominent boxes on the website version of Mastodon, and on the official apps it appears in the About section of your profile.

Verifying your account

You can verify your identity on the Fediverse by several methods, click here for more info about all of them.

↩ Back to the front page

How do I verify my account on Mastodon and the Fediverse?

Screenshot of the Mastodon profile of the Texas Observer featuring verified official website links in green.
Example of a Mastodon profile with a verified official website link and also running on its own server with its own domain name

If you have an official website, the most straightforward way to verify your identity on Mastodon is to link to your Mastodon profile from that official website. If you include a special piece of HTML code in this link, it will make your website address turn green on your Mastdon profile and people will instantly know that you are the owner of (or professionally connected to) that website. If people already trust your website to be official, then by extension they can trust your account to be who it says it is.

Alternatively, if you’re really keen, you can also create an official Fediverse server based on the web address of your official website. This is, for example, how the European Union has verified all its official accounts on the Fediverse.

How to make a link on your Mastodon profile page turn green

On Mastodon, you can create a special verified website link on your profile which turns green. This means anyone browsing your profile will immediately know you’re verified as the owner of the website:

  1. Log in through your Mastodon server’s website
  2. Go to Edit profile > Verification
  3. Copy and paste the HTML code from the verification section on Mastodon into your official website’s front page’s code
  4. On Mastodon, add your website’s address into your Mastodon profile’s Metadata section, remembering to include https:// at the beginning.
  5. On Mastodon, press the Save changes button in your Mastodon profile settings. It is important that you do this step after you have already inserted the HTML code into your website.

After you’ve done all this in the correct order, you will see a link to your official website on your Mastodon profile which has will turn green with a green tick next to it, to verify you are the site’s owner. If you have any problems, see the troubleshooting section below.

This can also be used to verify specific pages on a website, for example if you’re listed as a staff member on an organisation’s website. As long as the creator of the website is willing to add the special verification code, you can verify the link.

Create your own server and have your official Fediverse account there

If you’re really keen, the most watertight way to verify your identity is to make your own Fediverse server as a subdomain of your official website. This is what the European Union did when they made their own Mastodon server ⧉ and their own PeerTube server ⧉. Because the European Union’s official website is well known as being at europa.eu, and their servers are all subdomains of europa.eu, it means all the accounts on their servers can be trusted as being official EU Fediverse accounts. Making your own server on a subdomain is much easier and cheaper than you think.

…but don’t verify by doing any of these!

  • Don’t use “verified” badges next to your name, they don’t mean anything. Because no one owns the Fediverse, there is no central authority to give out “verified” badges the way Twitter etc do. If you do see any Twitter-style verified badges these are just custom emoji and don’t mean anything, it’s just people having fun or messing around.
  • Don’t use centralised “verification” services or sites, even if they seem to be friendly and/or temporary. As the Fediverse has expanded, various brand new websites have sprung up trying to set themselves up as the one and only way to verify identity. It’s rubbish, don’t fall for it. The entire point of being on the Fediverse is to prevent any central authorities taking over, and there are already many tried and trusted ways to verify your identity on the Fediverse without using centralised services.

My website address won’t turn green! How do I make it happen?

Don’t panic, there are things you can do:

  • Make sure that all the links to your Mastodon account on your website include rel=”me” in their link code. If there’s one without rel=”me”, for example in a dropdown menu, the verification process may fail.
  • Bear in mind there may be some delay before your website address turns green on your profile, don’t worry if it doesn’t happen straight away.
  • The website address can be case sensitive, so try typing it entirely in lower case.
  • The website address has to have https:// at the beginning (which also makes it clickable)
  • Make sure the HTML code of the a href contains only rel=”me”, the link and no other attributes such as styles.
  • Make sure that you haven’t accidentally used http:// instead of https://
  • Try using this debugging tool ⧉ to check why the link doesn’t turn green

Also, note that each server on the Fedi verfies addresses independently and at their own pace. It is possible that people on other servers may see your address turn green before you do.

If your website link still won’t turn green, try verifying through the header instead

If you can’t get the normal link code to work for verification, you can instead insert this code into your site’s front page’s header:

<link href="https://yourserver/@yourusername" rel="me">

Substitute your profile page’s URL for the example in the code, but leave it otherwise intact.

↩ Back to the front page

Can I use my account to log in on other servers?

No, but you don’t need to.

Your account only works on one server, because all the servers are independent. The server you joined is your gateway into the wider network, because all the different servers talk to each other despite being separately owned.

To use an analogy: you can’t sign in on Yahoo Mail with a Gmail account, but you can still send emails between Yahoo Mail and Gmail because all the different email servers talk to each other despite being separately owned.

You can of course have multiple accounts if you want to, but there’s no technical need to do this as you can follow people on other servers from a single account. People with multiple accounts on the Fediverse typically only do this for non-technical reasons, for example separate work and personal accounts.

↩ Back to the front page

What’s my account’s address? How do I follow other people’s addresses? How can people follow my address?

One of the best ways to follow your friends on Mastodon and the Fediverse is to exchange account addresses with them.

All accounts on the Fediverse have a unique address that looks like this:

@ your username @ your server

Your address is visible on your profile page, just below your profile picture and display name.

Screenshot of Mastodon official app, with profile page visible and its account address highlighted
Account address on a profile, as seen through the official Mastodon app
Screenshot of Mastodon web interface with account address highlighted on profile.
Account address on a profile, as seen through the Mastodon web interface

If you want people to follow you on the Fediverse, give them your full account address from your profile. Addresses are by far the most reliable way to find an account’s profile. You can exchange Fediverse addresses with friends in real life the same way you would exchange phone numbers.

Each full account address is unique because only one account has that username on that server.

You can follow an account by copying and pasting its address into the search box on Mastodon (or whatever Fediverse server type you’re using) and then searching for it. The account associated with that address will appear in the search results, and clicking on it will take you to the account’s profile page. You can then follow it by clicking the Follow button.

If you can’t see the search box, click here to see how to access search on the apps and website.

An account address pasted into the search box on the official Mastodon app
An address pasted into the search box on the Mastodon desktop interface

Other types of Fediverse addresses will also work on Mastodon

As well as Mastodon addresses, the above process will also work with other types of Fediverse address including Pixelfed, PeerTube, OwnCast, BookWyrm, Friendica etc. When such an address is viewed within Mastodon it will look like a Mastodon profile, but it’s actually on another server type. If you open its original page you will see what it “really” looks like.

Why do Fediverse addresses look like email addresses?

Fediverse addresses look like email addresses because they use a similar structure for federating their networks together. Each server is independent and the servers talk to each other, so the address includes both the server’s name and the user’s name to make sure messages get to the correct account. Because only one person can register a particular username on a particular server, an account’s full address is always a unique combination.

Why does it usually show just the first part of my address in posts? Why does it sometimes show the full addresses?

In order to make the posts easier to read, Mastodon and many other Fedi platforms abbreviate addresses to just show the first part of the address when you’re @-ing people within a post. However, if there are two addresses with the same username being discussed in the same post, then Mastodon will show the entire addresses to avoid confusion.

Think of it like names and full names in real life: in a conversation you would probably just use part of someone’s name (“Have you met John?”), but if there were two identical names in the same conversation you might say both names in full to distinguish them (“Have you met John Smith and John McDonald?”).

Why can’t I just find accounts by searching?

You can find accounts by searching, however if an account is very new or if no one on your server has ever interacted with it, it may not be visible in search results yet. This is why account addresses are so useful, because they force your server to notice that account straight away.

↩ Back to the front page

How do I use Mastodon through the web? How do I log in through my server’s website?

You can use Mastodon entirely through your server’s website if you prefer. This works especially well on computers, but the mobile web interface is good too and appears automatically on small screens. To log in through the web:

  1. Go to your server’s website
  2. Click the Sign in button
  3. Log in with the same email and password you use to sign in on the app

Each server is independent and has its own website you log into. The address of the website is usually the same as the name of the server. For example, if you joined Mastodon through the server kind.social you would log in through the website kind.social ⧉.

Because of the way the network is structured, there is no central website to log in from, so you must go to your server’s own website to log in. Although the servers talk to each other to form a single network, you have to log in on your own server so that you can access this shared network.

My password doesn’t work! I can’t remember my password! I can’t log in, help!

If you are unable to log in through your server’s website, try doing these steps in this order:

  1. Make sure you are logging in on the correct website. You have to log in through your own server’s site, which will usually be the same as the server’s name. If you don’t know your server’s name, it’s in the last part of your account address.
  2. Make sure you are typing the password correctly. Passwords are case sensitive, so you need to make sure each letter’s case is correct.
  3. Underneath the login form there will be a link that says something like “Forgotten password?” or “Having trouble logging in?”. Click this link, then enter your email address and it will send you an email with a reset link in it. If the email hasn’t arrived after a few minutes, check your spam folder in case it’s there,
  4. If you’re still having trouble logging in on Mastodon, go to your server’s website and click on the Learn more link (you don’t need to log in to do this). This link will take you to the server’s info page which always includes a public email address for that server’s admin. You can email them for help with getting your password changed.

By the way, if you have a computer using Mastodon through the website is perhaps the best way to experience it. Fans of the multicolumn Tweetdeck may also want to try the advanced web interface.

↩ Back to the front page